CS-Cart Advanced Import Export helps store owners manage bulk data efficiently and accurately.
This add-on simplifies the import and export process of products, customers, and orders while improving overall store management.
With high-speed processing and queue-based execution, this add-on handles large amounts of data smoothly without impacting storage performance.
It supports multiple file formats and flexible import options, making data migration and synchronization faster and more reliable.
This add-on is ideal for marketplace owners who want to automate bulk data handling, reduce manual effort, and increase operational efficiency.
Notes: you need Queue Controller Add-ons to use this add-on properly.
- Import and export product, customerAnd order easily on CS-Cart Marketplace.
- Process bulk data with high speed performance supports up to 5000 products per second.
- Handle big data operations smoothly using queue-based processing.
- Supports various file formats, including CSV, T.S.V, XML, XLSX, JSON, ZIPPERAnd TER.
- Choose flexible import options with Just Make It, Just an UpdateAnd Create and Update mode.
- Update notes using Product ID, Product Code, E-mailor Product name.
- Process product images efficiently with queue-based image processing.
- Configure field mapping based on entities for accurate data import and export.
- Import data directly from FTP, SFTP, Google Drive, Amazon S3, Dropbox, Zoho SheetsAnd Cloudflare R2 source.
- Reduce manual effort with advanced bulk data management feature.
- Improve store performance during large imports and exports with optimized processing system.
Additionally, if you want to start accepting secure online payments, you can integrate Stripe’s CS-Cart Payment Gateway to enable seamless and secure transactions through Stripe.
CS-Cart Advanced Import Export Add-on Installation
After downloading CS-Cart Advancing Imports and Exports add-on, you will get one zip file, one install.txt file, and the relevant User Guide manual document.
Please read it carefully for correct configuration.
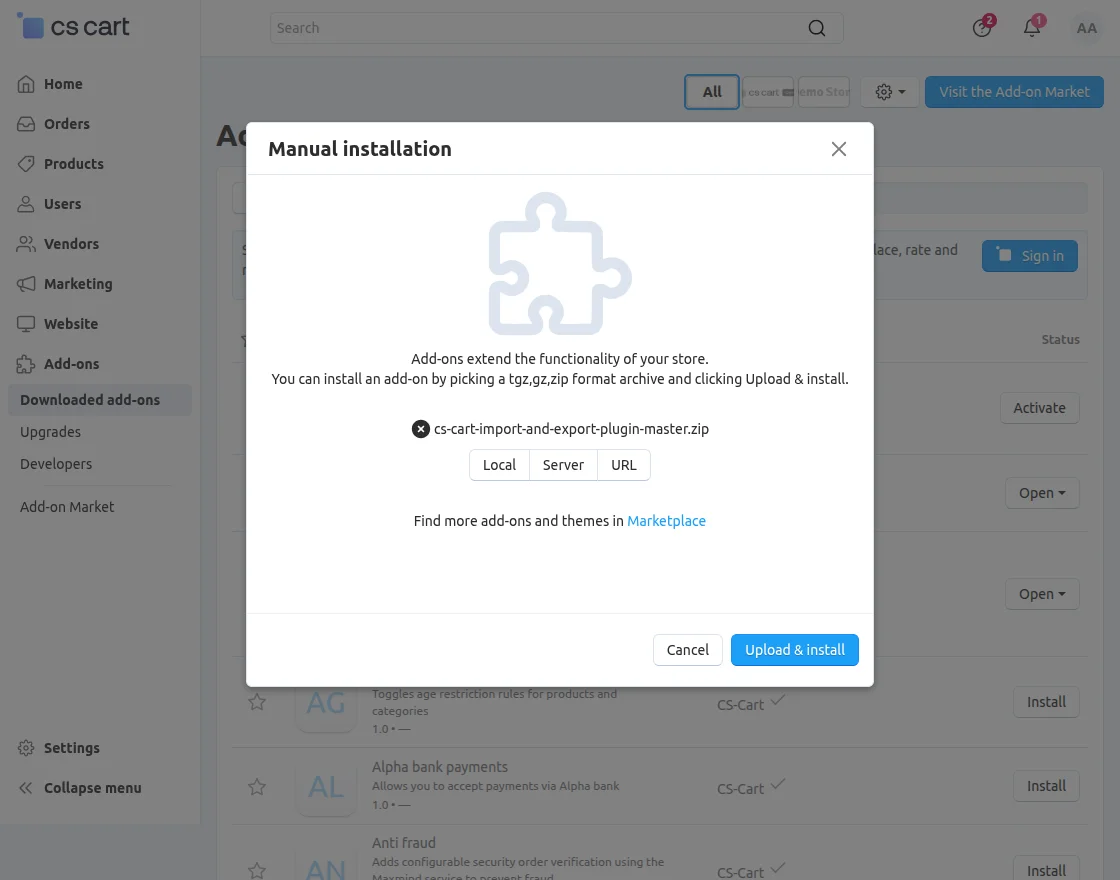
Go to Manage Add-ons, and click “Manual Installation” as shown below in the snippet.
Click “Local” to browse to the zip file, then click “Upload & Install” as shown below in the snippet.
Library installation
You can also download the library manually if needed.
Navigate to the following location using the terminal:
app/addons/wk_advance_import_export/lib
Run command:
composer update
To configure advanced mapping For product, orderAnd customernavigate to Marketing >> Advanced Mapping from the CS-Cart admin panel.
Product Mapping
You must enter a name for product mapping configuration.
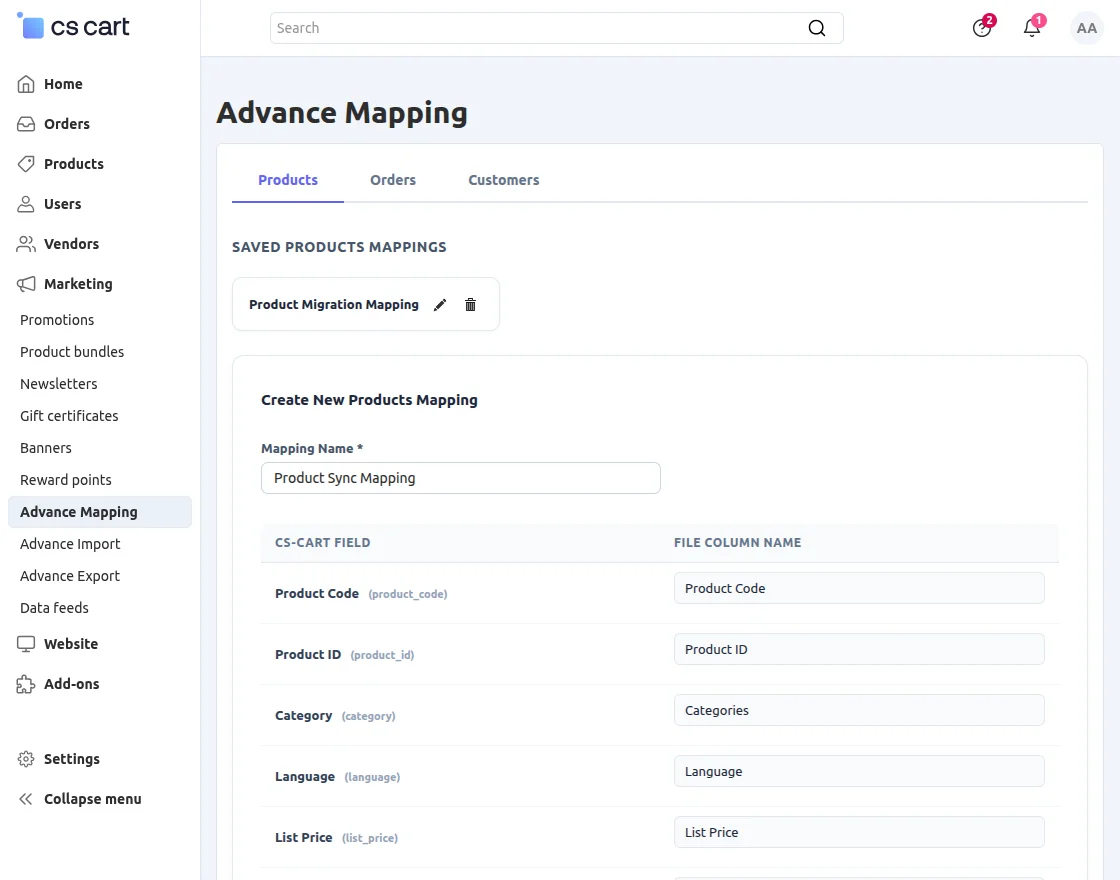
Map it product field from your import file with the appropriate one CS-Cart product fields.
Order Mapping
Enter a name for order mapping configuration.
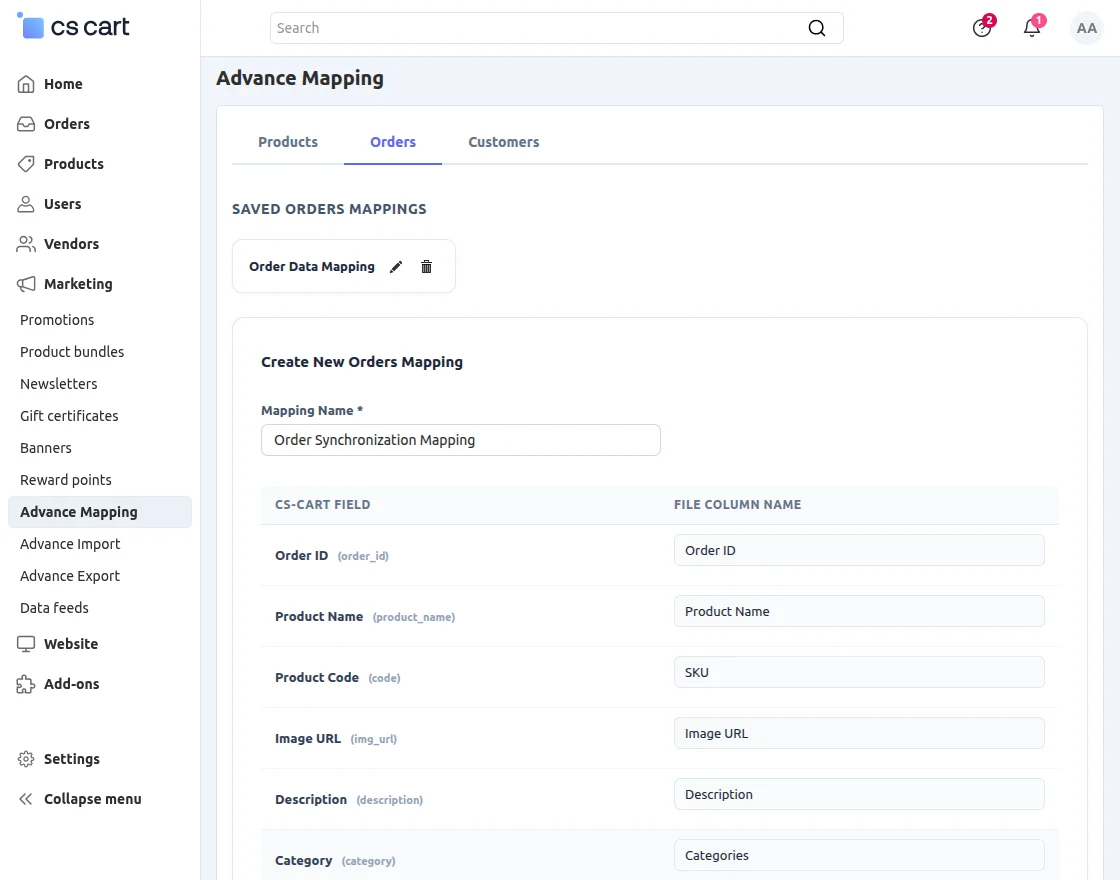
Map it order field from your import file with the appropriate one CS-Cart order field. You can also skip this step if you want to use default field mapping.
From here, you can easily manage mappingincluding add, editingAnd delete mapping configuration.
Customer Mapping
Enter a name for the customer mapping configuration.
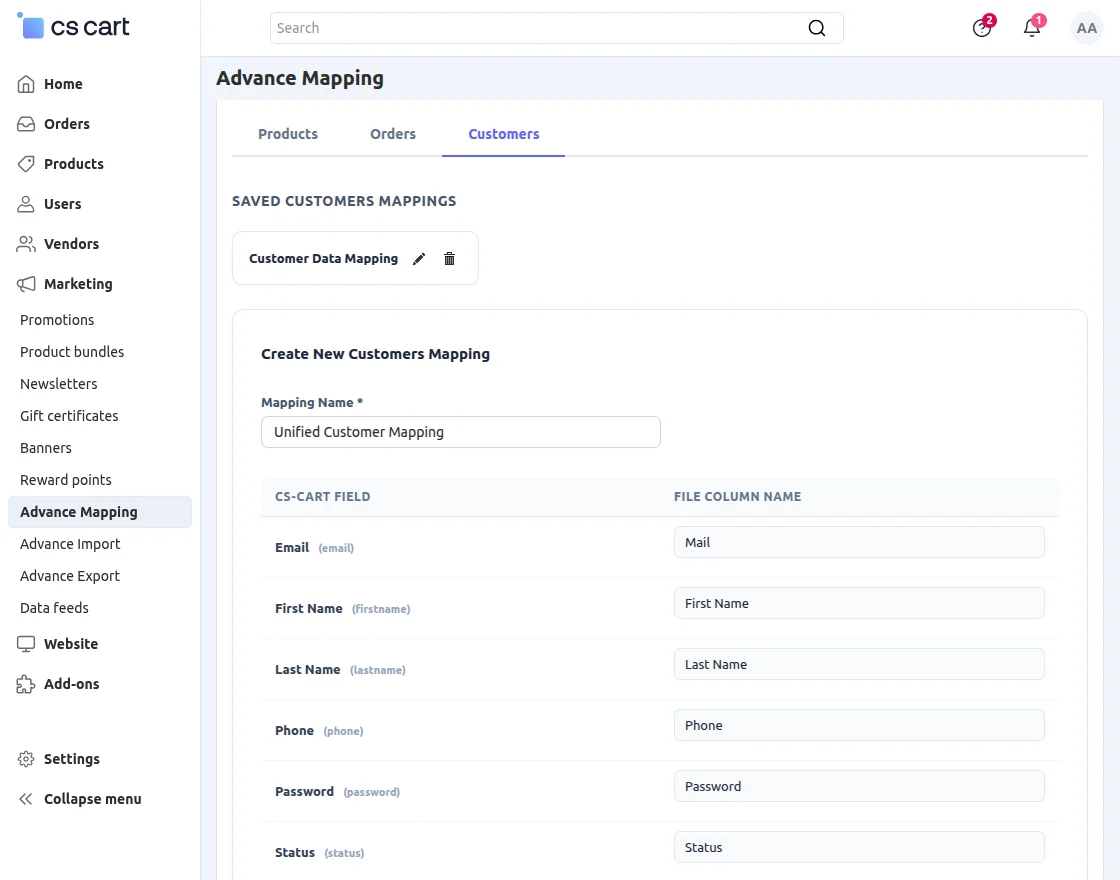
Map it customer field from your import file with the appropriate one CS-Cart customer field. You can too manage, editor delete Mapping configuration as needed.
To import files, navigate to Marketing >> Advanced Import from the CS-Cart admin panel.
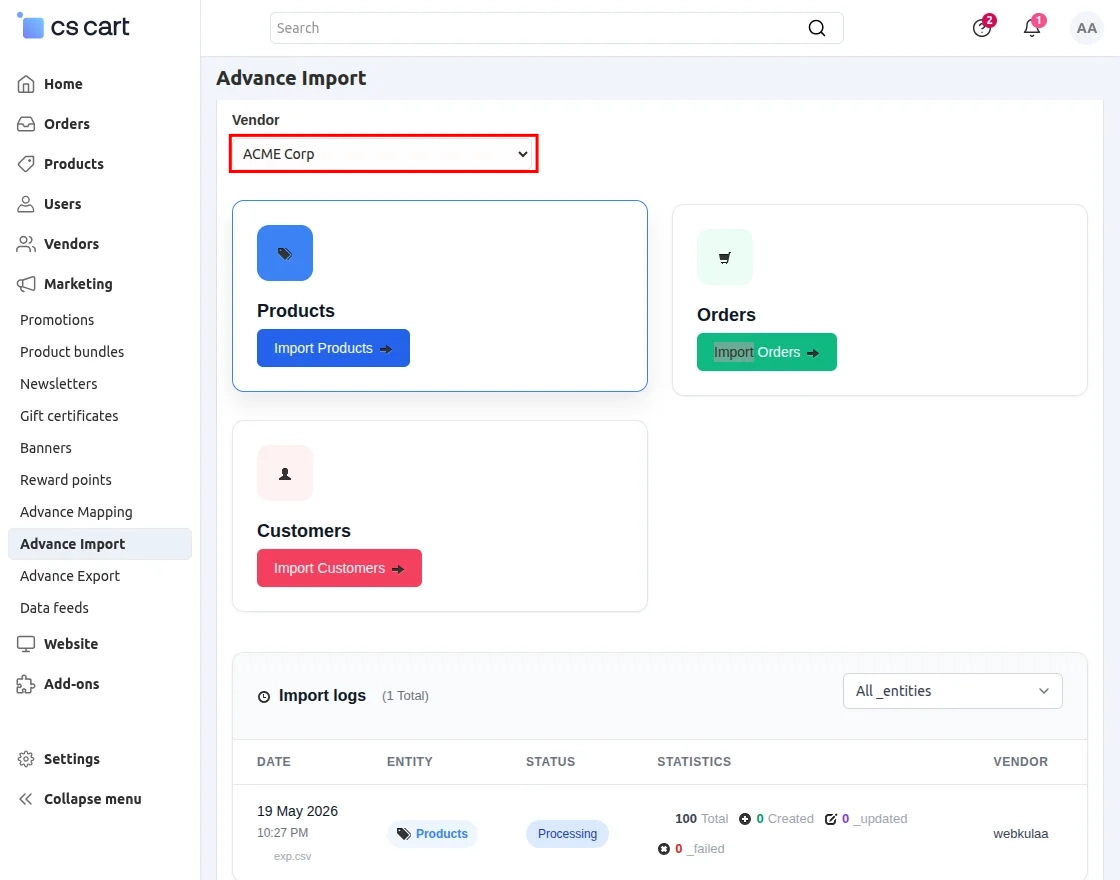
Choose seller for whom you want to import the product.
Import Products
Click Import Products button to import products to the store.
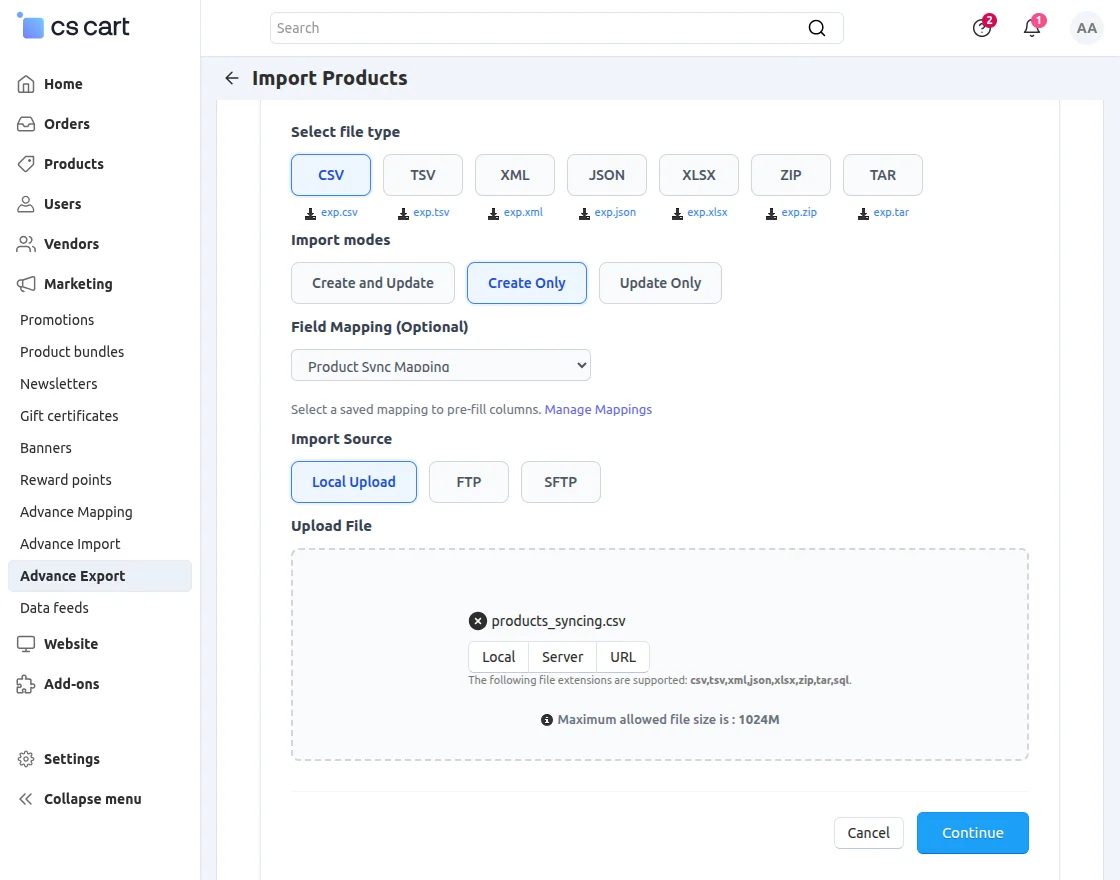
- Select File Type: Select the file format you want to use to import products.
- Import Mode: Select the required import mode according to your business needs.
- Field Mapping: Map the import file fields with the corresponding CS-Cart product fields.
- Import Source: Select the source from which you want to import product data.
URL: Enter the import source URL, such as Google Drive, Amazon S3, Dropbox, Zoho Sheets, Cloudflare R2, etc.
FTP: Enter the FTP credentials required to connect and import files from the FTP server.
SFTP: Enter SFTP server credentials to connect and import files securely.
Import Orders
Click Import Orders button to import orders to the store.
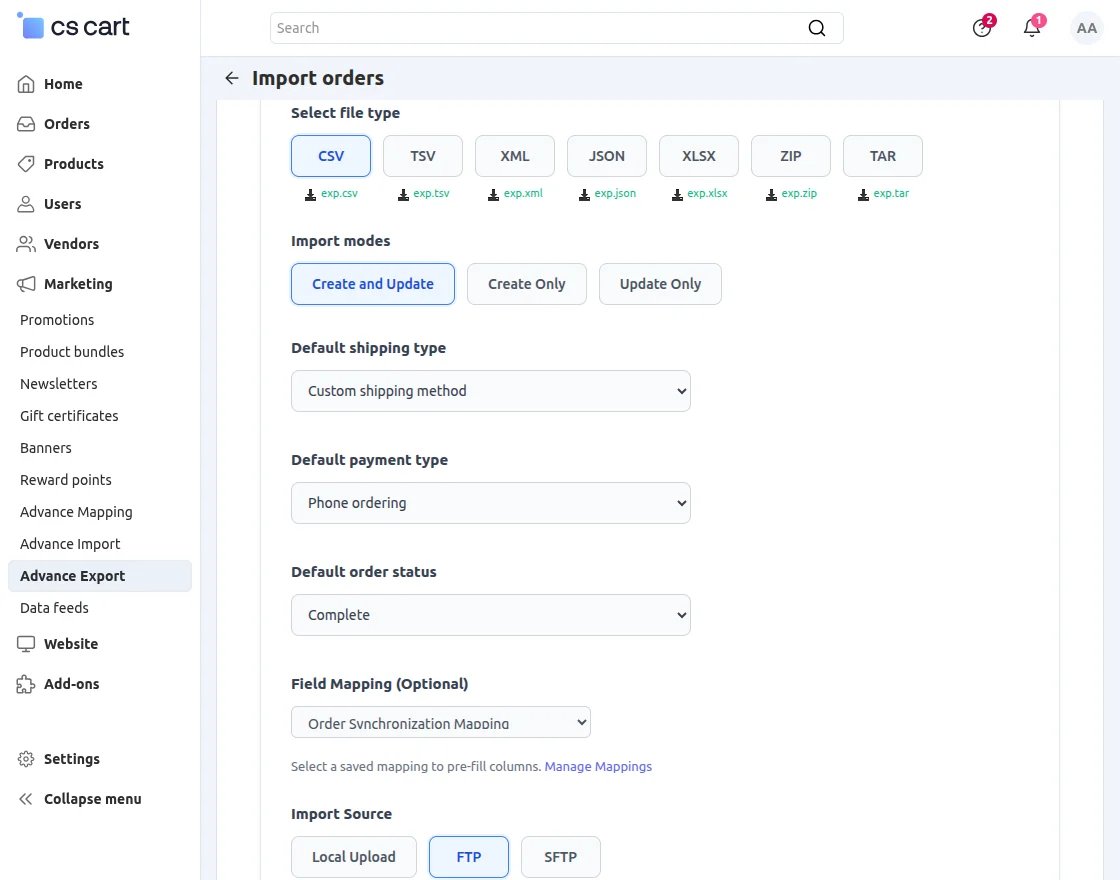
- Select File Type: Select the file format you want to use to import orders.
- Import Mode: Select the import mode required for the order import process.
- Default Shipping Type: Select a default shipping method to apply to imported orders.
- Default Payment Type: Select the default payment method for imported orders.
- Default Order Status: Select a default order status for imported orders.
- Field Mapping: Map the import file fields with the corresponding CS-Cart order fields.
- Import Source: Select the source from which you want to import order data.
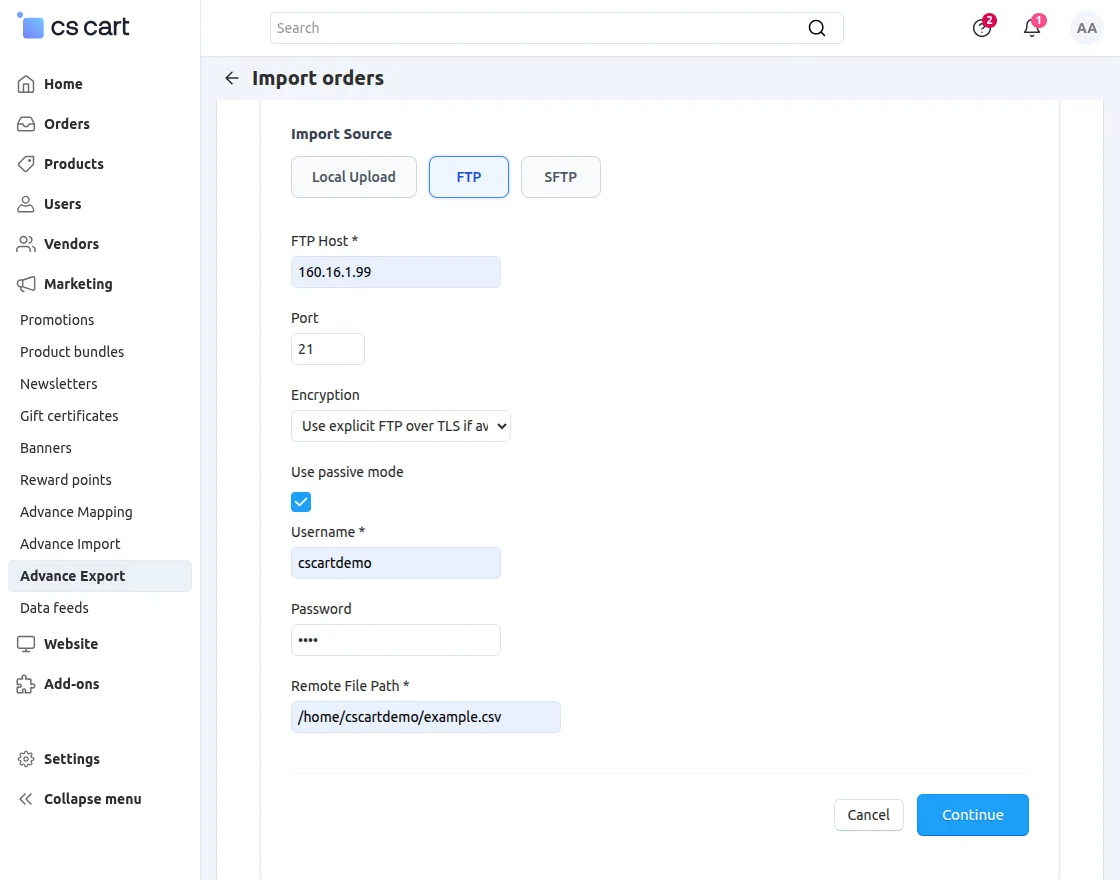
If you choose FTP as an import source:
- Enter the file track from where you want to import the data.
- Insert FTP Host And Harbor details.
- Select the required one encryption type.
- Contents Last name And Password for FTP access.
Import Customers
Click Import Customers button to import customers to the store.
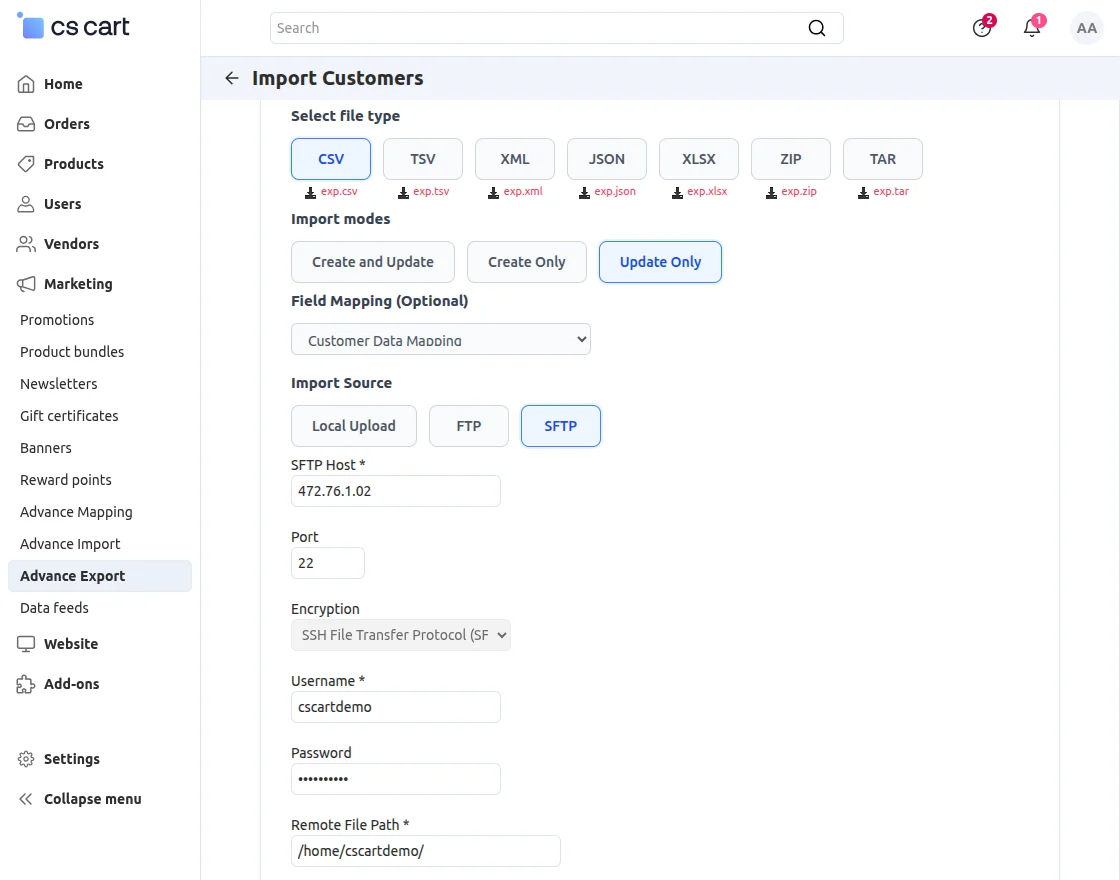
- Select File Type: Select the file format you want to use to import customers.
- Import Mode: Select the import mode required for customer import.
- Field Mapping (Optional): Map the import file fields with the corresponding CS-Cart customer fields, or skip this step to use the default mapping.
- Import Source: Select the source from which you want to import customer data.
If you choose SFTP as import source, enter SFTP Host, Last name, PasswordAnd Remote File Path details for connecting and importing data.
For advanced export from product, customerAnd ordernavigate to Marketing >> Advanced Export from the CS-Cart admin panel.
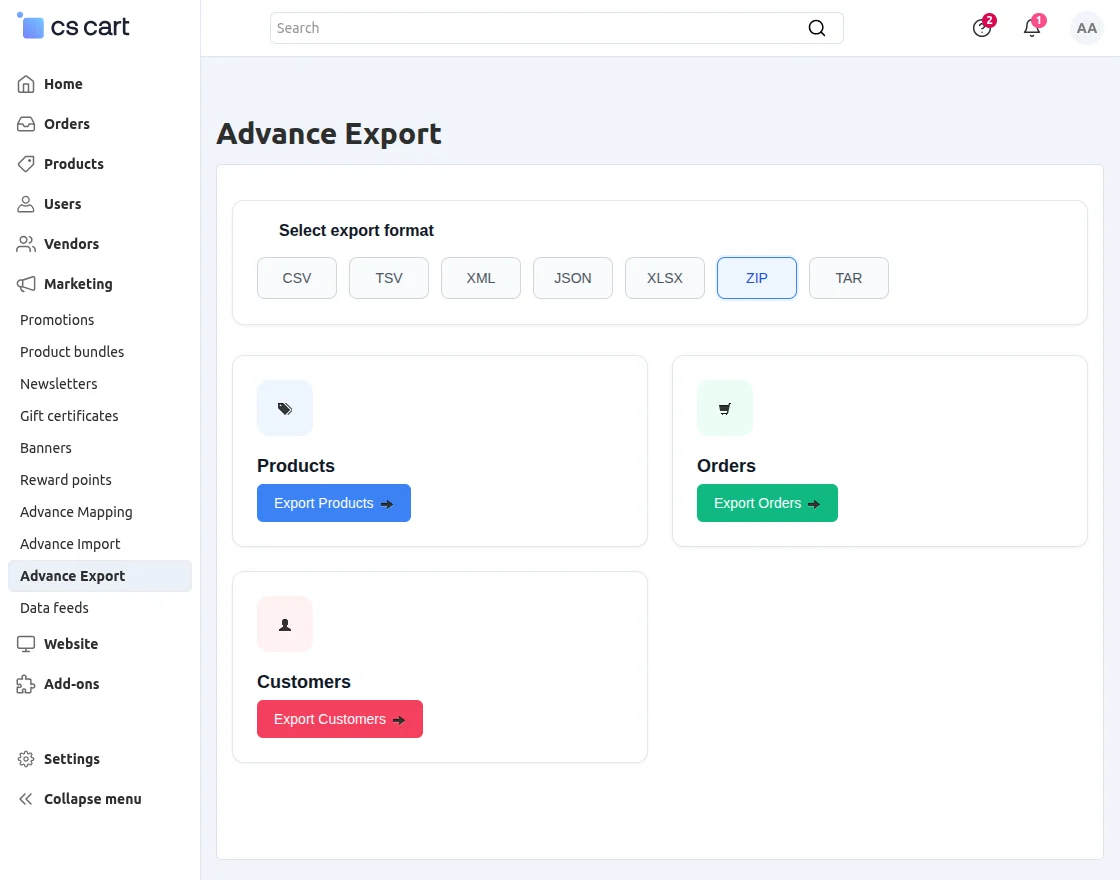
- Select Export Format: Select the file format you want to use to export product data.
Product Export
Click Product Export button to export products.
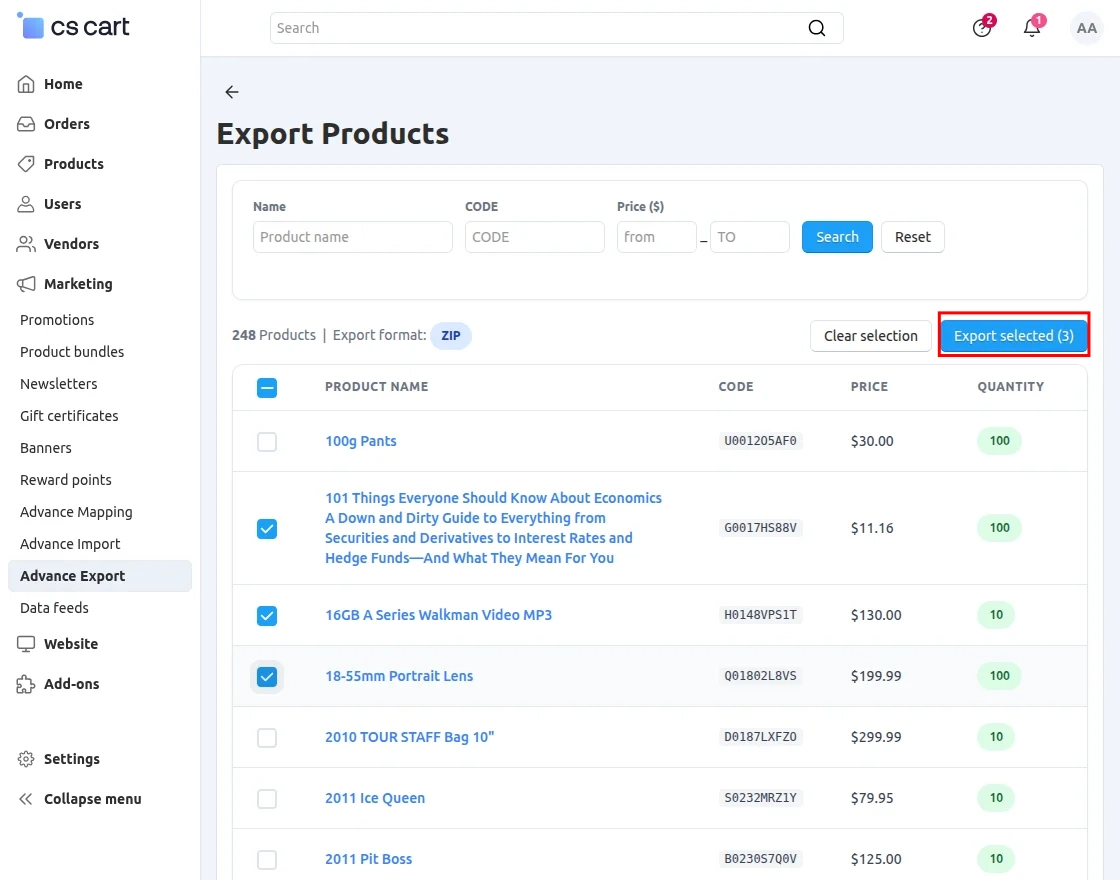
Choose product that you want to export from storage data.
Export Orders
Click Export Orders button to export orders.

Choose order that you want to export and continue the export process.
Customer Export
Click Customer Export button to export customers.
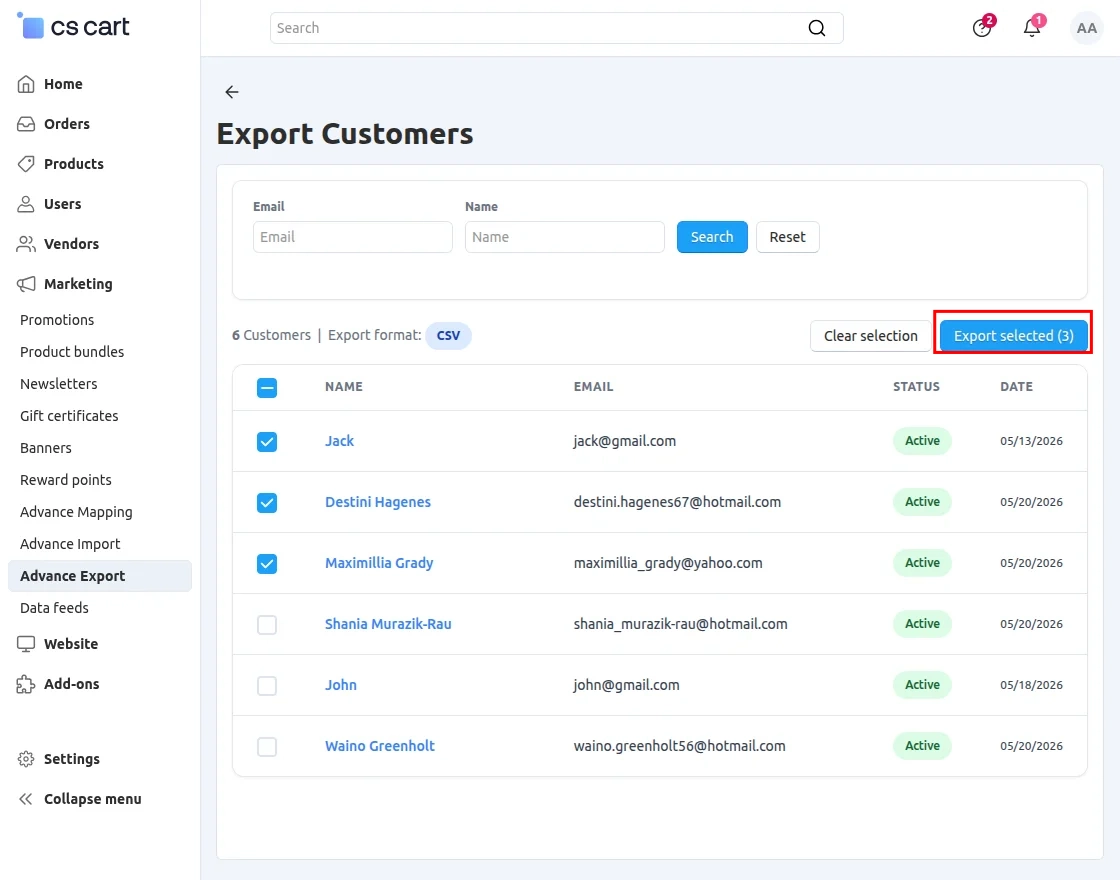
Choose customer that you want to export and continue the export process.
If you have any questions, suggestions, or customization requests, please feel free to contact us at [email protected] or submit a ticket at webkul.uvdesk.com.
Explore our premium quality CS Cart Extensions to enhance your store’s functionality.
You can also explore our CS-Cart Development Services and Quality CS-Cart add-ons.
Current Product Version – 1.0
Supported Framework Versions – 4.18.x, 4.19.x, 4.20.x

PakarPBN
A Private Blog Network (PBN) is a collection of websites that are controlled by a single individual or organization and used primarily to build backlinks to a “money site” in order to influence its ranking in search engines such as Google. The core idea behind a PBN is based on the importance of backlinks in Google’s ranking algorithm. Since Google views backlinks as signals of authority and trust, some website owners attempt to artificially create these signals through a controlled network of sites.
In a typical PBN setup, the owner acquires expired or aged domains that already have existing authority, backlinks, and history. These domains are rebuilt with new content and hosted separately, often using different IP addresses, hosting providers, themes, and ownership details to make them appear unrelated. Within the content published on these sites, links are strategically placed that point to the main website the owner wants to rank higher. By doing this, the owner attempts to pass link equity (also known as “link juice”) from the PBN sites to the target website.
The purpose of a PBN is to give the impression that the target website is naturally earning links from multiple independent sources. If done effectively, this can temporarily improve keyword rankings, increase organic visibility, and drive more traffic from search results.