ERPNext Multi-CRM Base allows you to connect multiple CRM systems with ERPNext from one place. This helps you manage all your CRM data without switching between platforms.
You can synchronize data such as leads, contacts, opportunities and items between ERPNext and an external CRM. This keeps your data updated and consistent across all systems.
ERPNext Multi-CRM Base also provides secure authentication, connection management, and data tracking. This ensures smooth data flow and better control over your CRM integration.
- Connect multiple CRM systems with ERPNext Multi-CRM Base using a single integration module.
- Supports OAuth2 and API key authentication for secure CRM connections.
- Create and manage multiple CRM connections with status tracking and validation.
- Two-way synchronization of contacts, leads, opportunities, and items between systems.
- Automatically match records using entity mapping and specific fields such as name and email to avoid duplicate data.
- Maintain entity mapping to track records synchronized between ERPNext and CRM.
- Update existing notes during resync instead of creating duplicates.
- Role-based access control to limit integration management to authorized users
1. After purchasing the app from the Webkul store, you will receive a link to download the ZIP file of the module.
2. Extract the downloaded ZIP file, and you will see a folder named ‘wk_erpnext_multi_crm’.
3. Set up the module in your Git repository.
4. If the application is hosted on GitHub, fetch the application using the command:
bench get-app --branch main
- (Replace “main” with your branch name and replace “HTTPS URL” with your HTTPS clone URL.)
5. Install the application on your site using the command:
bench --site <your-site_name> install-app erpnext_multi_crm_base
6. Finally, run the “bench migration” command to complete the installation.
ERPNext Multi-CRM Base Configuration: –
1. First, access the Multi CRM dashboard in the ERPNext Multi-CRM Base module by clicking Multi CRM from the vertical navbar on the left side.
Then, click Connector Type to create a new connector type according to your needs.
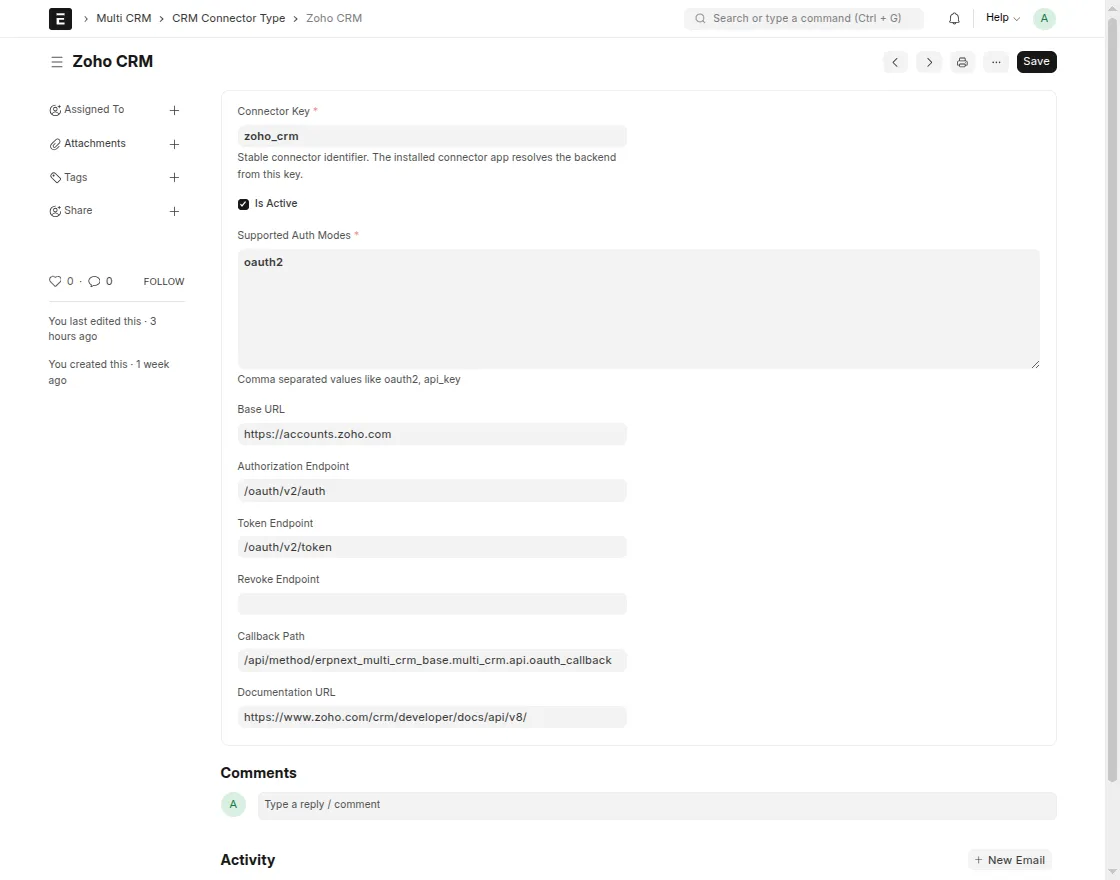
2. Then, fill in all the columns on the Connector Type page.
Enter the Connector Key, select the Supported Authentication Mode type, then provide the other CRM application’s Base URL, Authorization Endpoint, Token Endpoint, Revocation Endpoint, Callback Path, and Documentation URL.
After that, click Save.
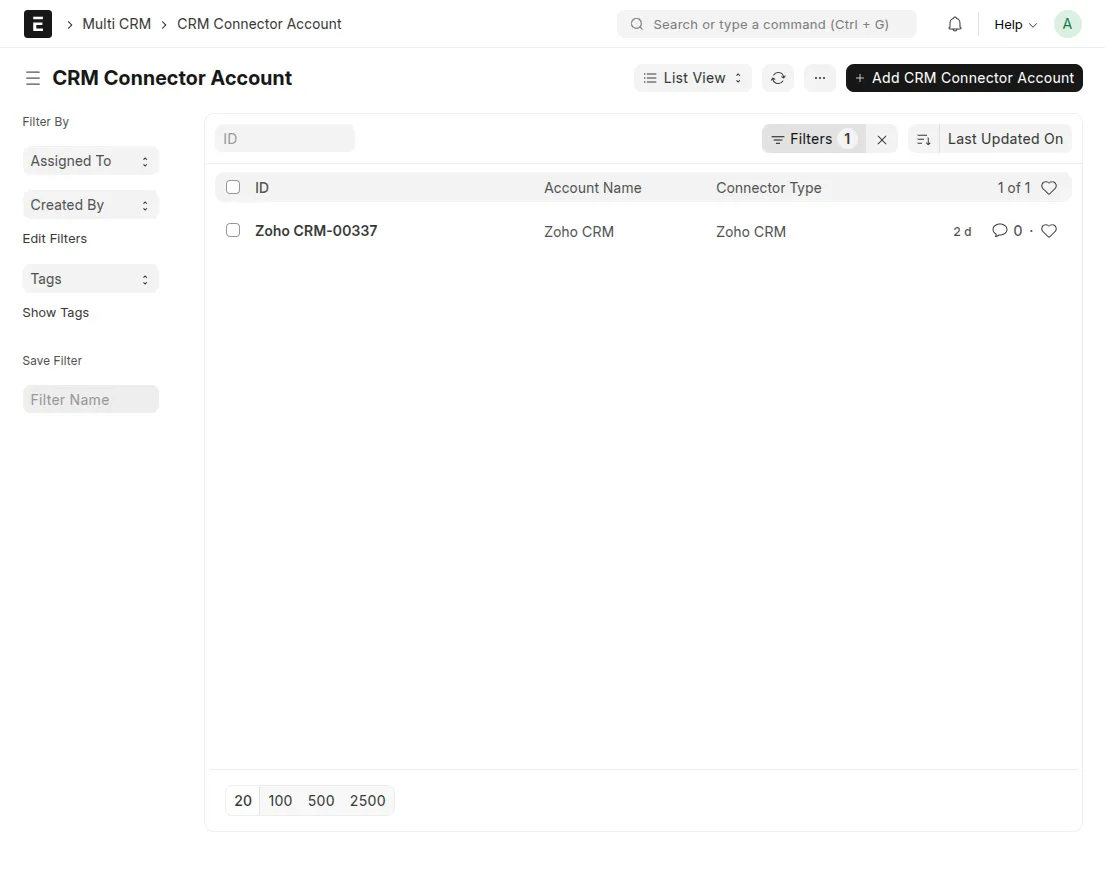
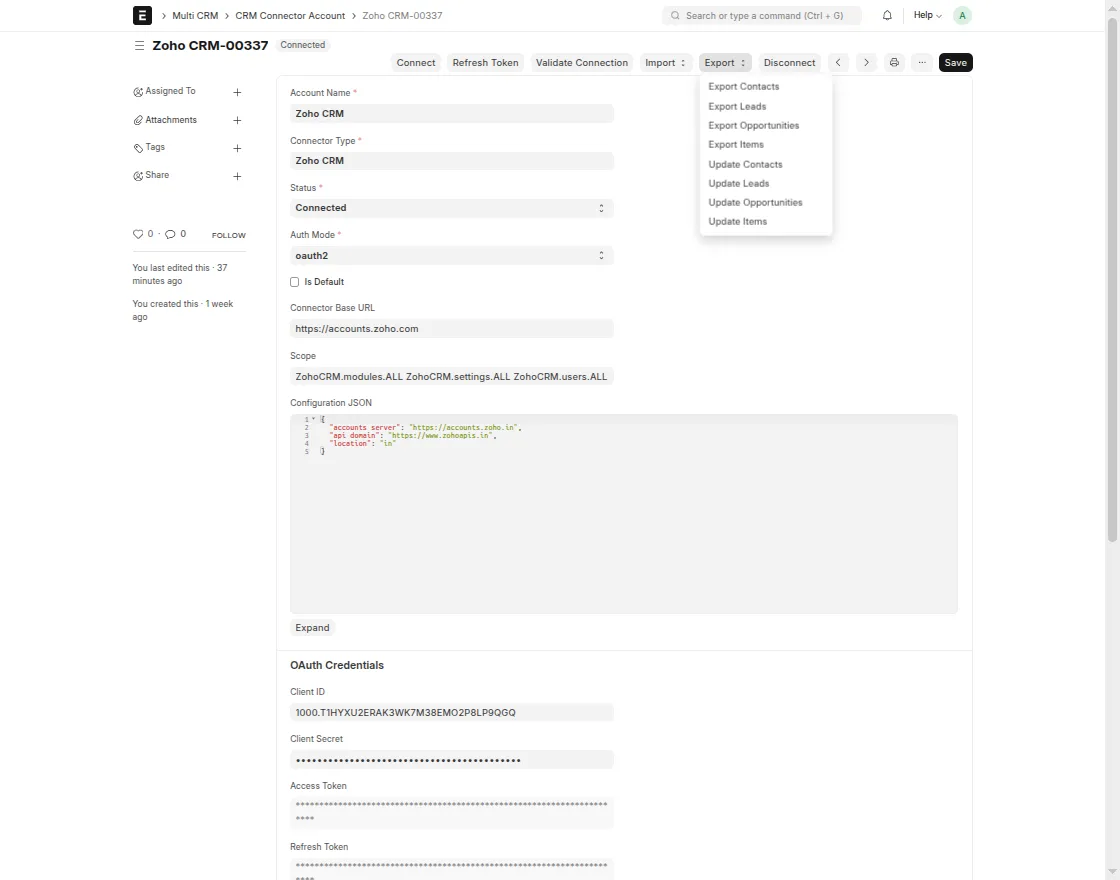
3. After that, click Connector Account to set up your connection with CRM. Here, you can create multiple accounts to connect with multiple CRM systems.
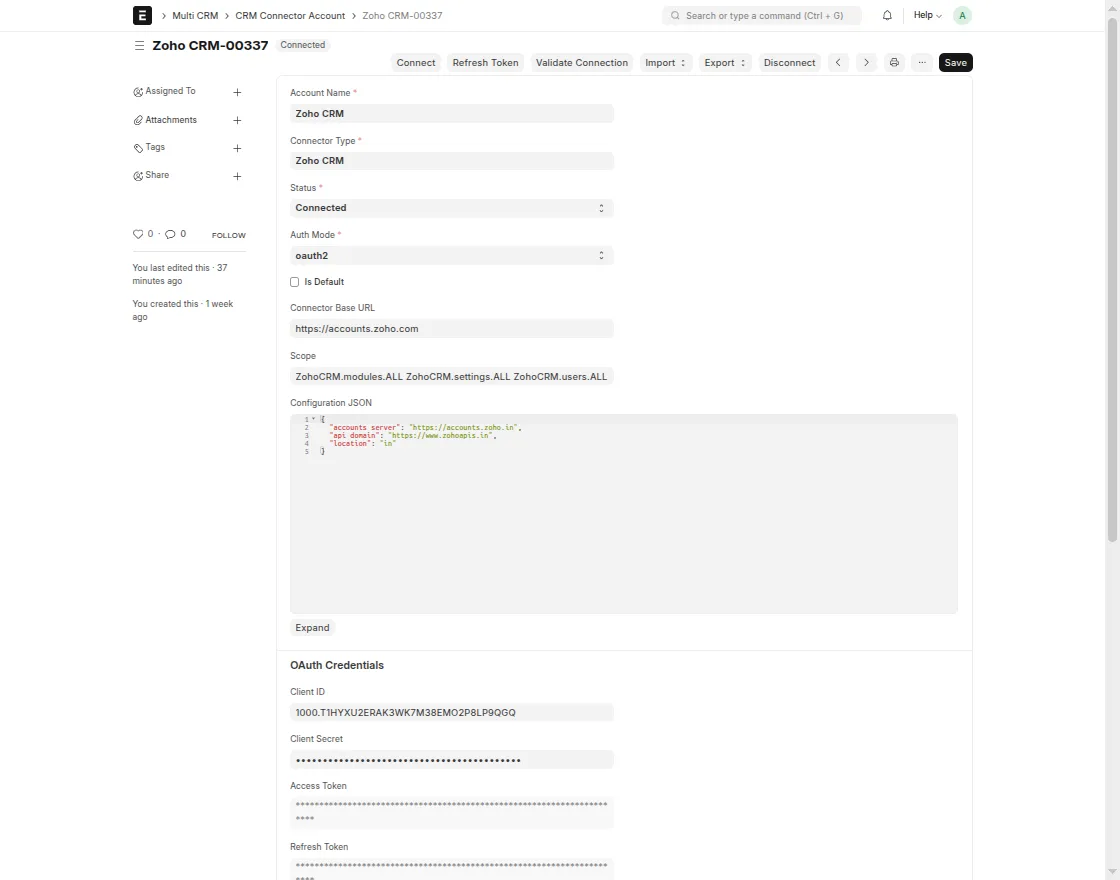
4. In the Connector Account form, enter the account name, select the connector type and authentication mode, and then paste the connector base URL along with the client ID and client secret generated from the other CRM.
Then click Save and Connect, and you can check the connection status by clicking Validate Connection.
5. Here, you can bi-directionally sync records such as contacts, leads, opportunities, and items from CRMs connected to ERPNext.
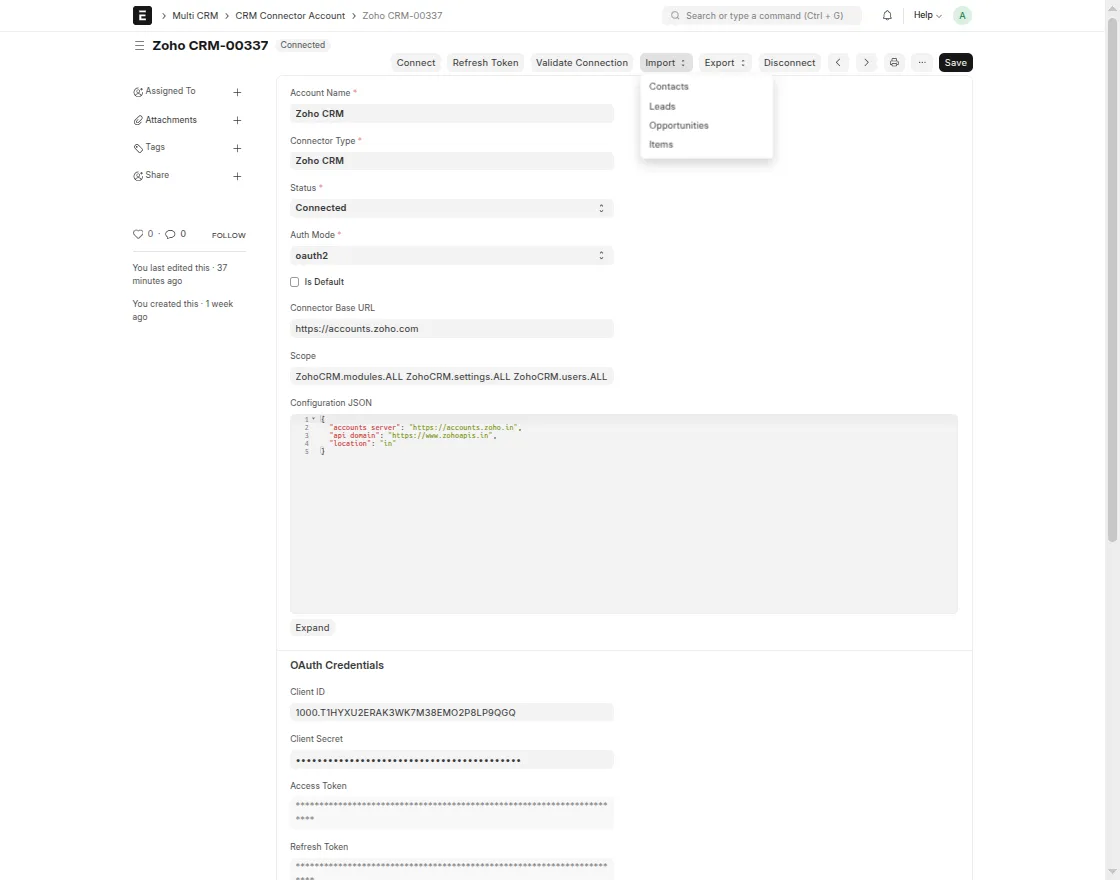
6. Here, you can also synchronize and update records such as contacts, leads, opportunities and items between ERPNext Multi-CRM Base and the connected CRM.
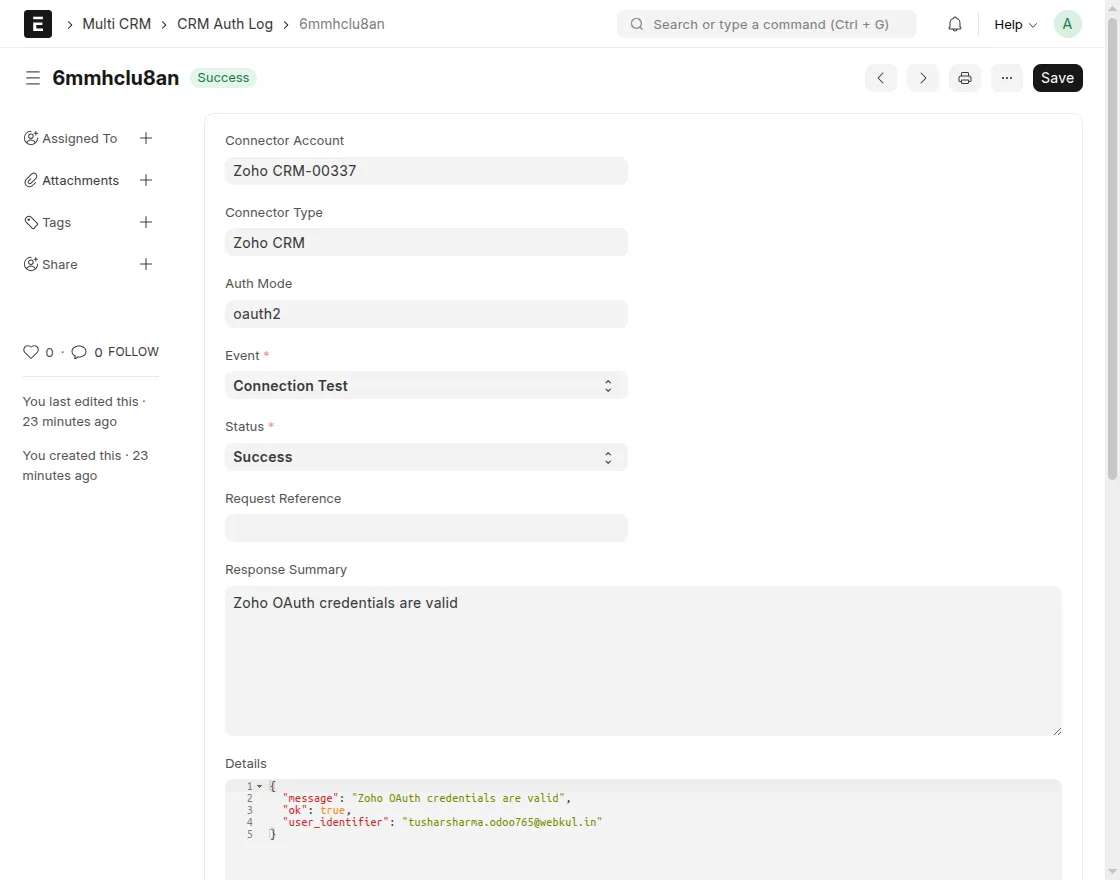
7. After that, click Authentication Log from the CRM dashboard to check the connection status and view authentication details like Connector Account, Connector Type, Auth Mode, Events, Request Reference, and Response Summary.
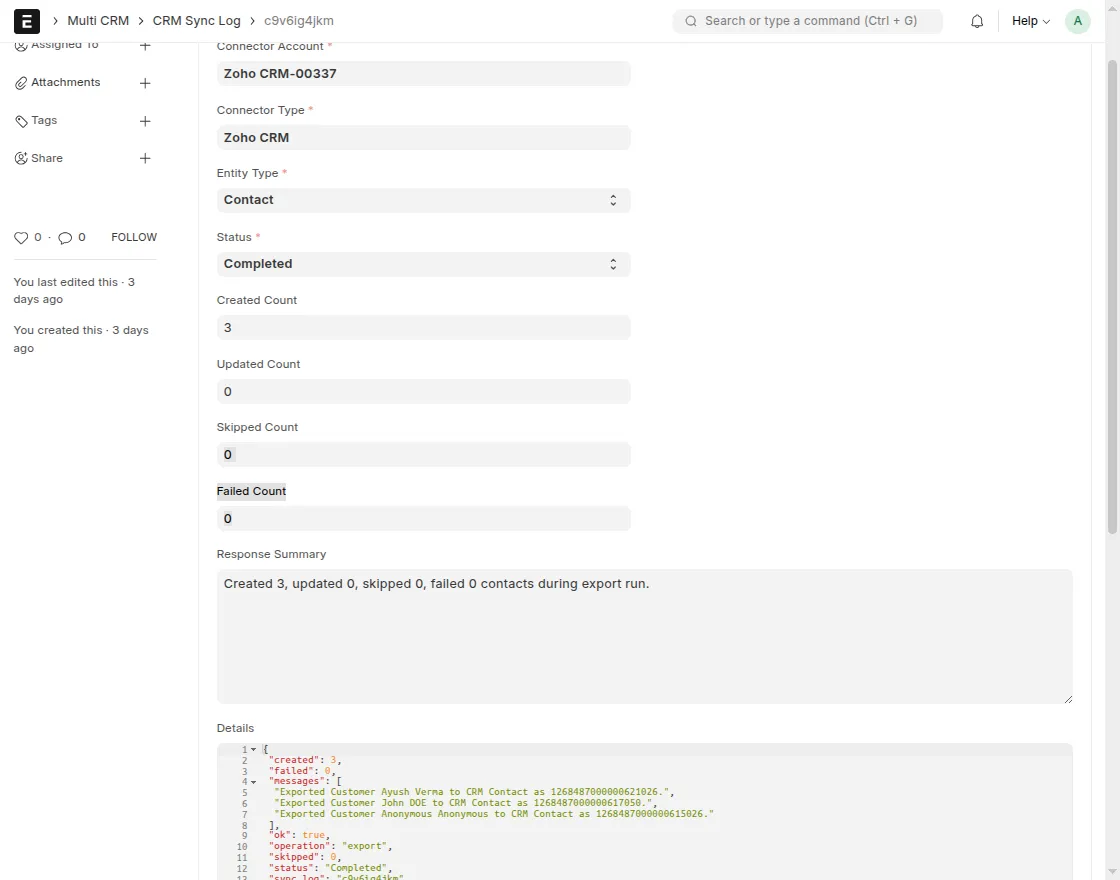
8. Then, you can click Sync Logs from the Multi CRM dashboard to check all the synchronized records between ERPNext and the connected CRM.
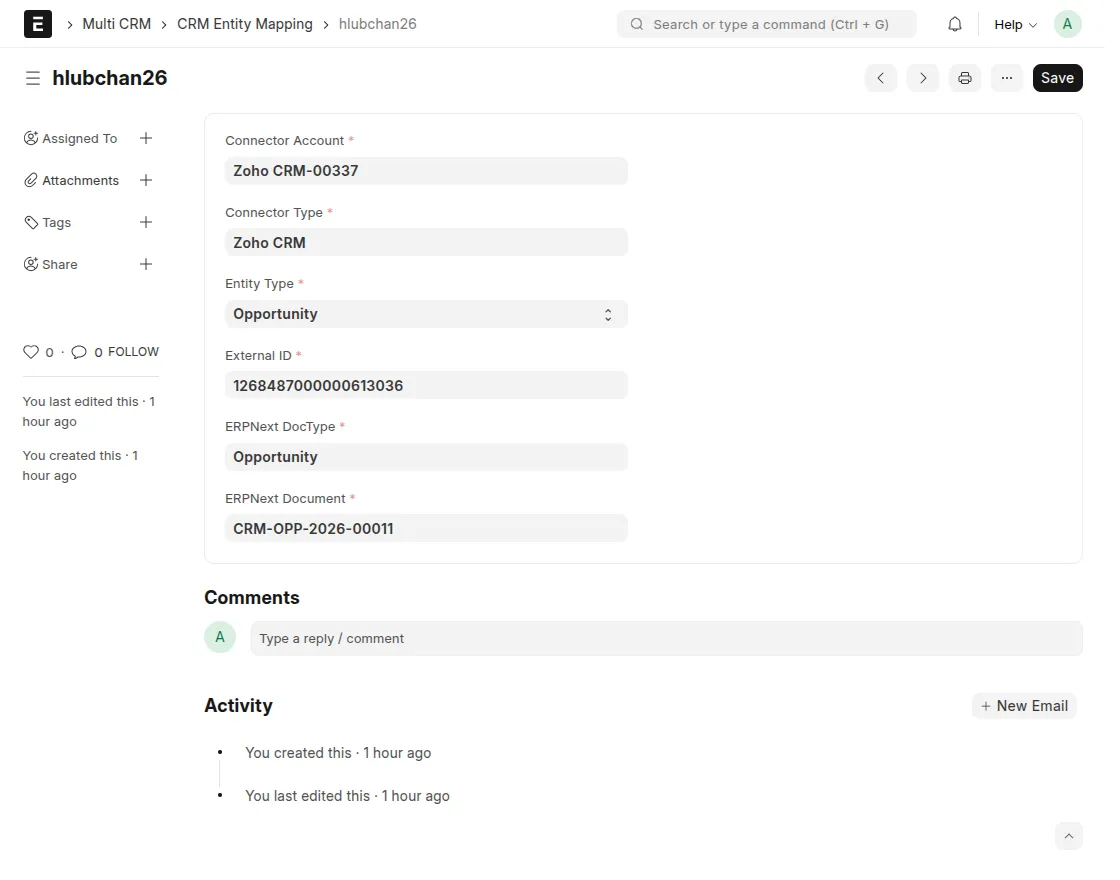
9. After that, you can click on Entity Types from the Multi CRM dashboard to check all the records mapped between ERPNext and the connected CRM.
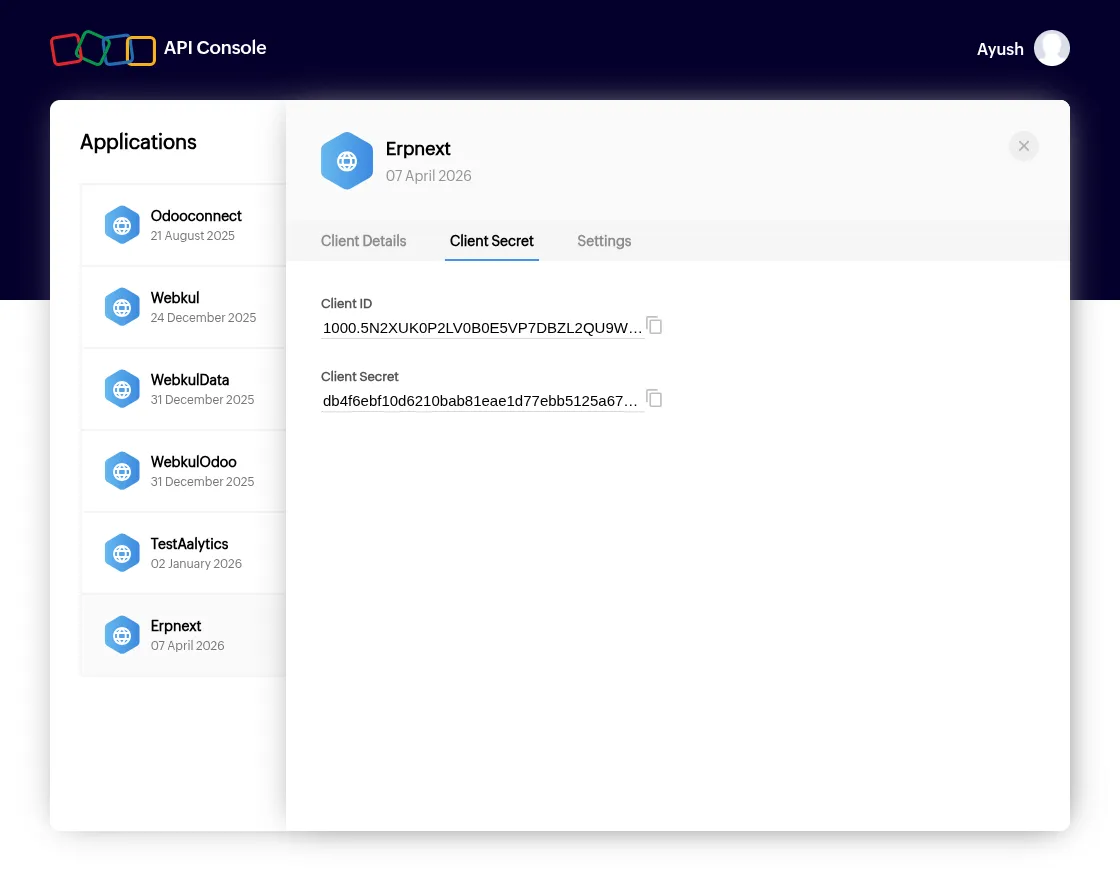
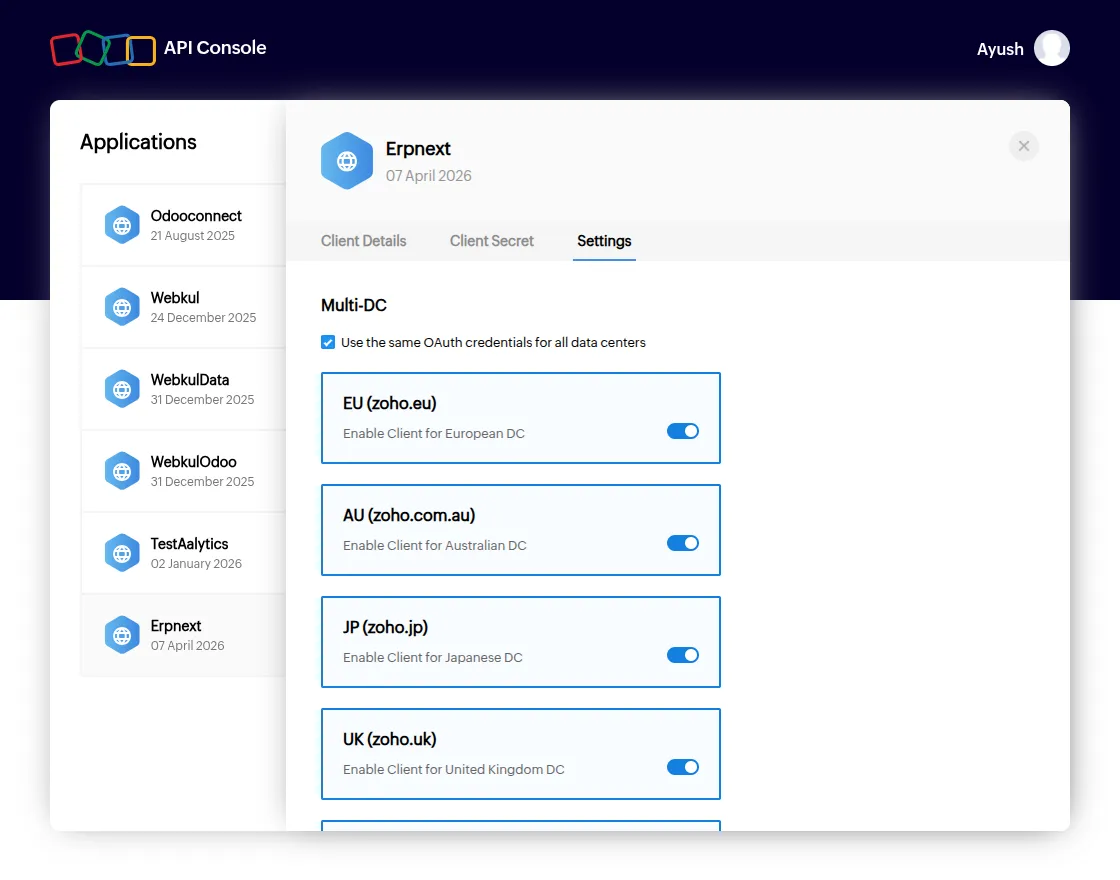
Client ID and Client Secret Creation: –
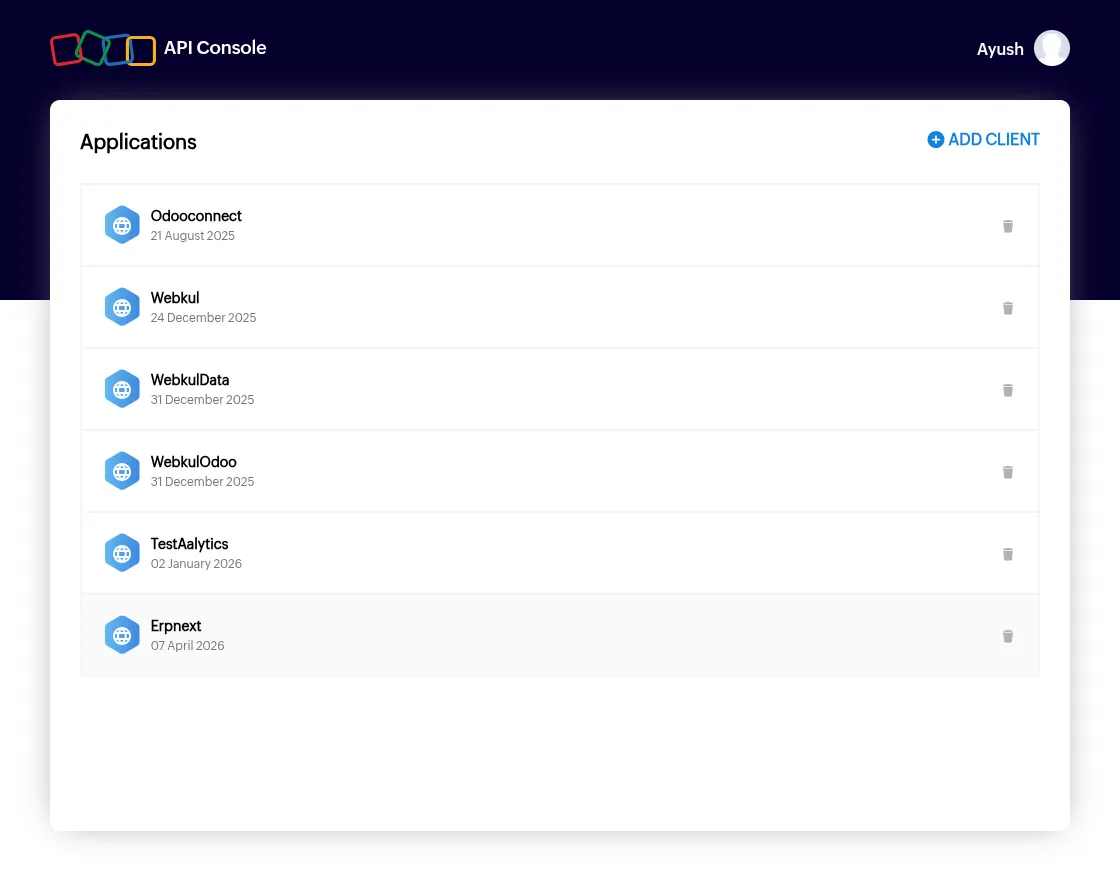
1. To create a client ID and client secret ID, open the CRM developer console and click Add Client.
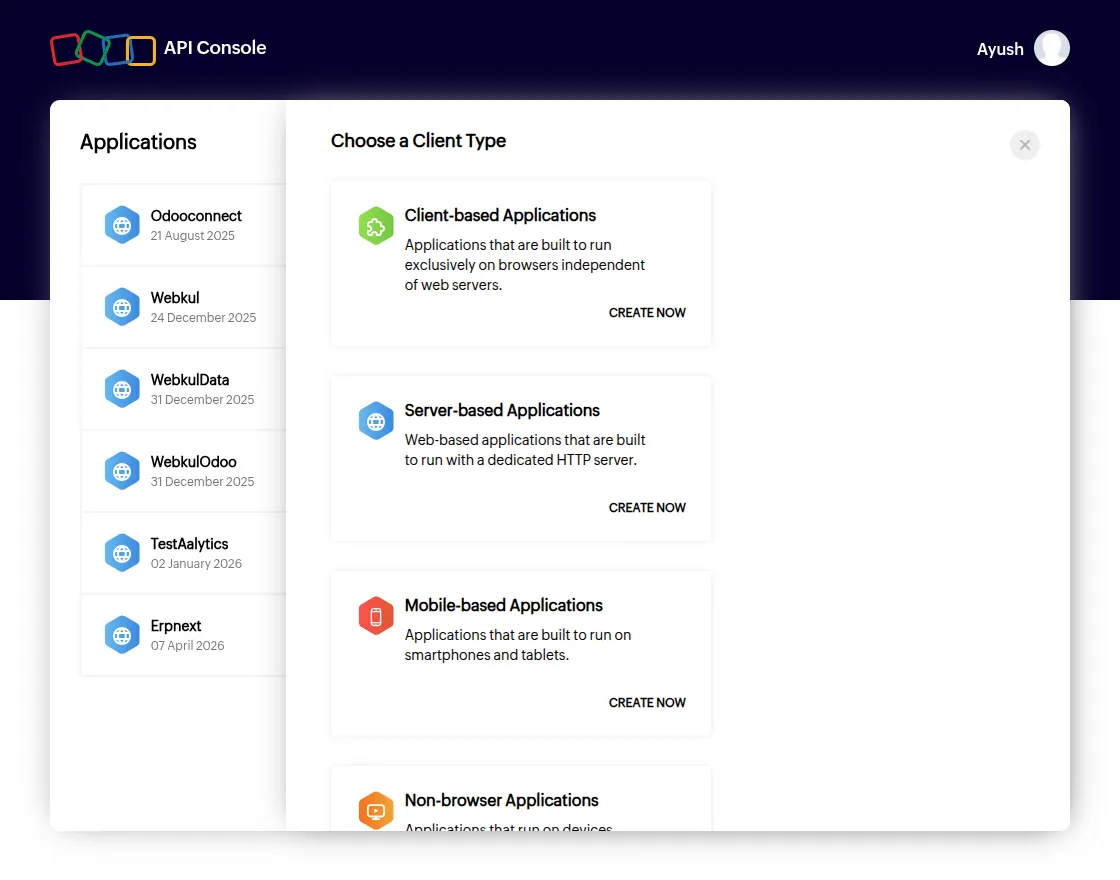
2. After that, select and click Server-Based Applications to create a new server-based application.
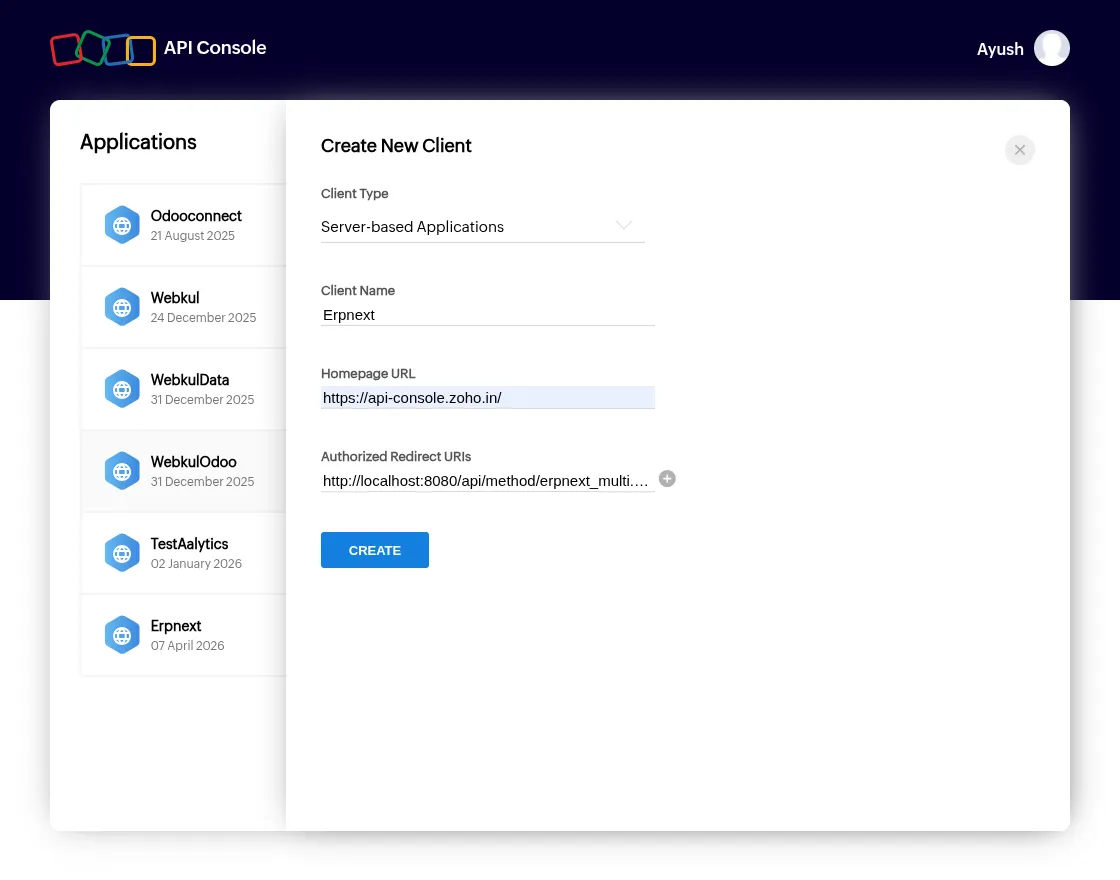
3. After that an empty form will appear. Fill in details like Client Name, Home URL, and Authorized Redirect URI, and once done, click Create.
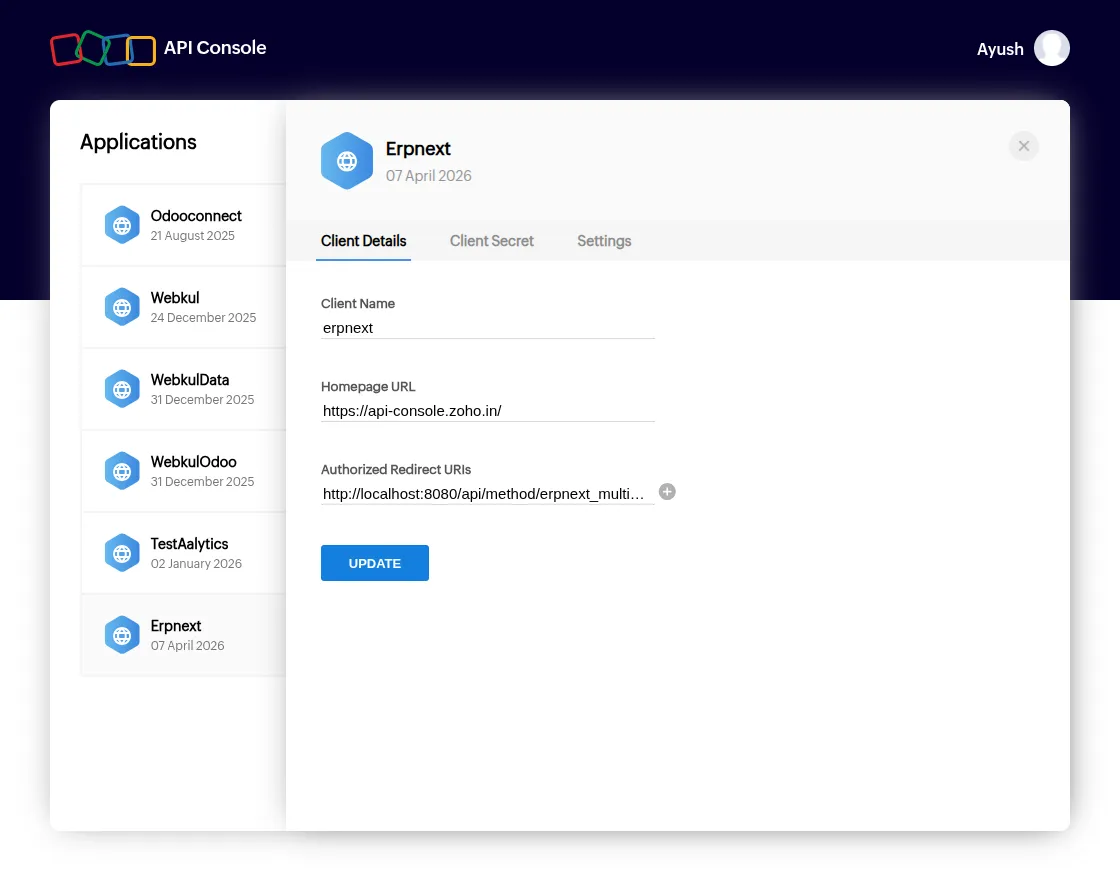
4. After creating a server-based application, you will receive a client ID, client secret, and other details, which can be used to set up a connection with ERPNext.
We hope this guide is useful for you! Please share your feedback in the comments below.
If you still have problems/questions, please create a ticket at UV Desk.
I hope this helps. If you have further questions, contact us on our support mail.
Thank you for noticing!!
Current Product Version – 1.5.0
Supported Framework Version – ERPNext V15

PakarPBN
A Private Blog Network (PBN) is a collection of websites that are controlled by a single individual or organization and used primarily to build backlinks to a “money site” in order to influence its ranking in search engines such as Google. The core idea behind a PBN is based on the importance of backlinks in Google’s ranking algorithm. Since Google views backlinks as signals of authority and trust, some website owners attempt to artificially create these signals through a controlled network of sites.
In a typical PBN setup, the owner acquires expired or aged domains that already have existing authority, backlinks, and history. These domains are rebuilt with new content and hosted separately, often using different IP addresses, hosting providers, themes, and ownership details to make them appear unrelated. Within the content published on these sites, links are strategically placed that point to the main website the owner wants to rank higher. By doing this, the owner attempts to pass link equity (also known as “link juice”) from the PBN sites to the target website.
The purpose of a PBN is to give the impression that the target website is naturally earning links from multiple independent sources. If done effectively, this can temporarily improve keyword rankings, increase organic visibility, and drive more traffic from search results.