Razorpay Odoo Marketplace Seller Payments is a module designed to help marketplace owners manage seller payments in a secure and controlled manner. First, ensure the seller’s bank account is verified before any payments are processed through Razorpay.
Additionally, this module supports both automated and manual merchant checkout workflows. As a As a result, admins can configure payment settings, validate merchant bank details, and manage payments from one centralized place.
Overall, by using this module, marketplaces can reduce payment errors, save manual effort, and ensure sellers receive payments on time.
Prerequisites for using Razorpay Odoo Marketplace Seller Payments
Razorpay Odoo Marketplace Seller Payments works in conjunction with the following modules:
Odoo Multi Vendor Marketplace
You have to install the above-mentioned modules to use Odoo Razorpay Seller Payments.
- Secure seller bank verification before processing payment
- Razorpay-based seller payments via verified bank accounts
- Automated seller payment options to reduce manual work
- Manual payment control is available to market administrators
- Centralized payment configuration managed from a single screen
- Admin controlled payment workflow based on business rules
- Real-time seller payment tracking for payment visibility
- Verified account payment protection to prevent failure
- Simple payment status monitoring for quick admin checks
INSTALLATION
- Once you purchase the App from Webkul store, you will receive a link to download zip module submit.
- Extract the files on your system once the download is complete. As a result, you will be able to see a folder named- ‘marketplace_razorpay_seller_payouts‘.
- Copy and paste this folder inside your folder Odoo Add-ons Path.
- Now, open the Odoo Application and click on the Settings menu. Here, click Enable Developer Mode.
- Then, open the Application menu and click ‘Update Module List.’
- In the search bar, clear all filters and search for ‘marketplace_razorpay_seller_payouts‘.
- You will be able to see the module in the search results. Click on ‘Activate‘ to install it.
Admin Workflow
1. Configure Razorpay Payment Provider
After installing Razorpay Odoo Marketplace Seller Payments,
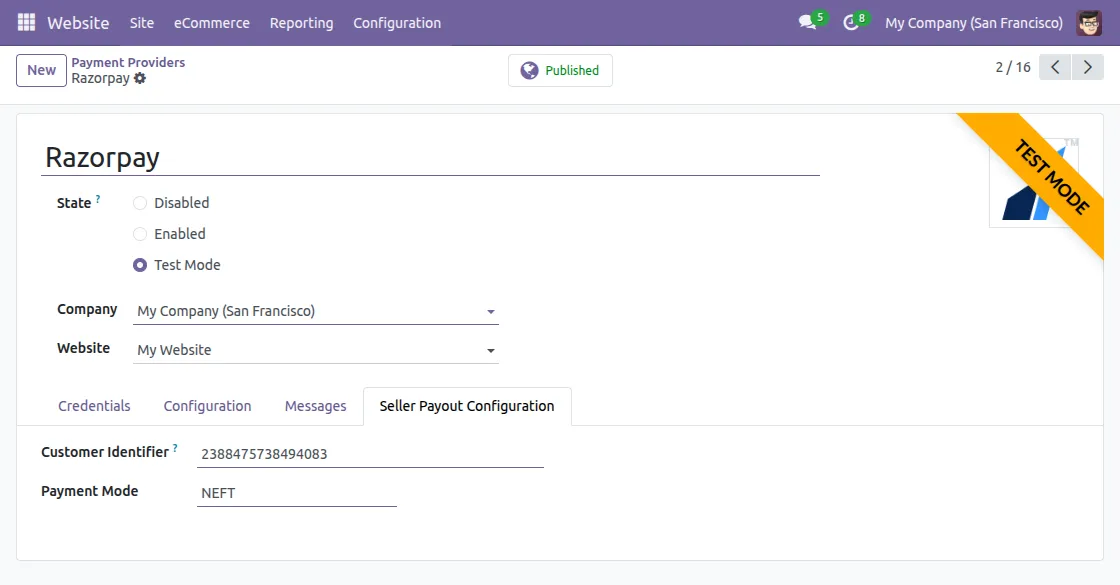
Go to Website → Configuration → Payment Provider → Razorpay. Enter the Razorpay API credentials and set the configuration.
- Then open it Seller Payment Configuration tab. Here, enter Customer Identifier and select Payment Mode. Save settings to complete Razorpay payment configuration.
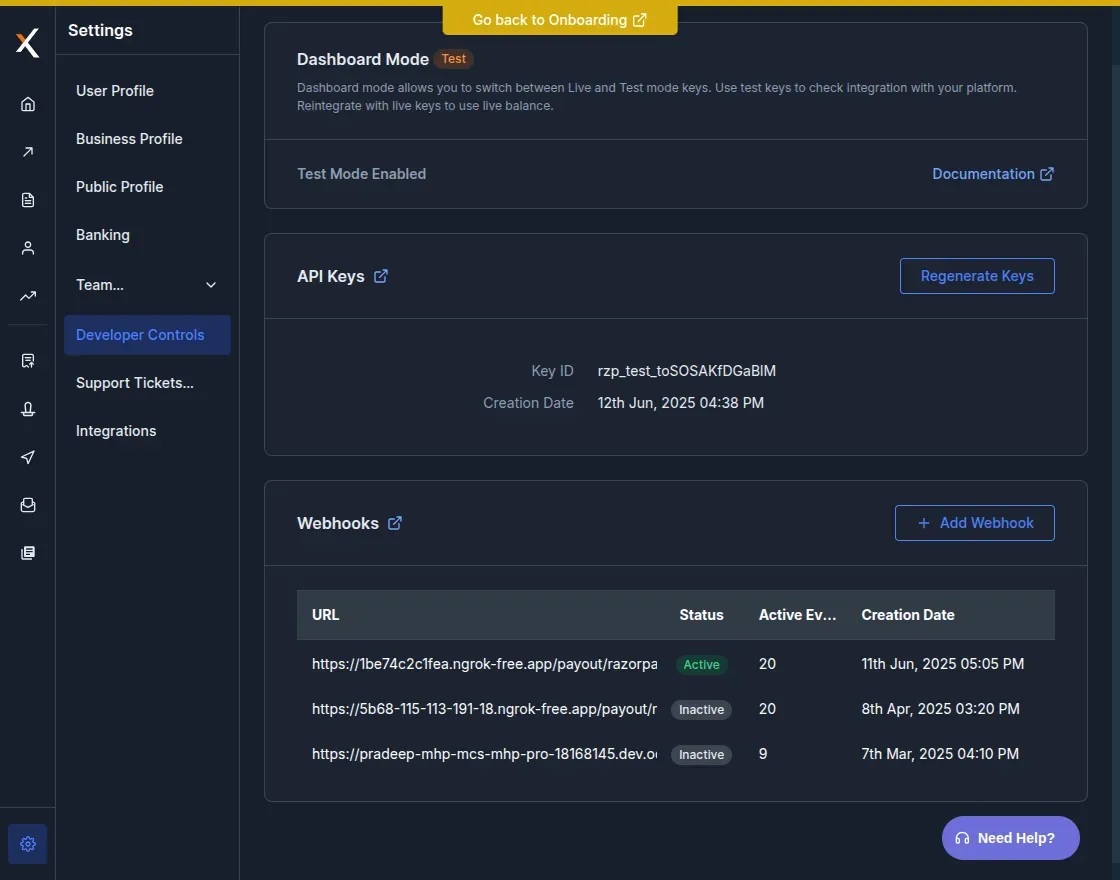
2. Configure Razorpay Webhooks
Open Razorpay Dashboardthen navigate to Webhook settings part.
Next, add your website URL followed by /payout/razorpay/webhook in the webhook configuration and save the settings.
This setting allows the system to receive payment status updates from Razorpay.
3. Enable Automated Seller Payments
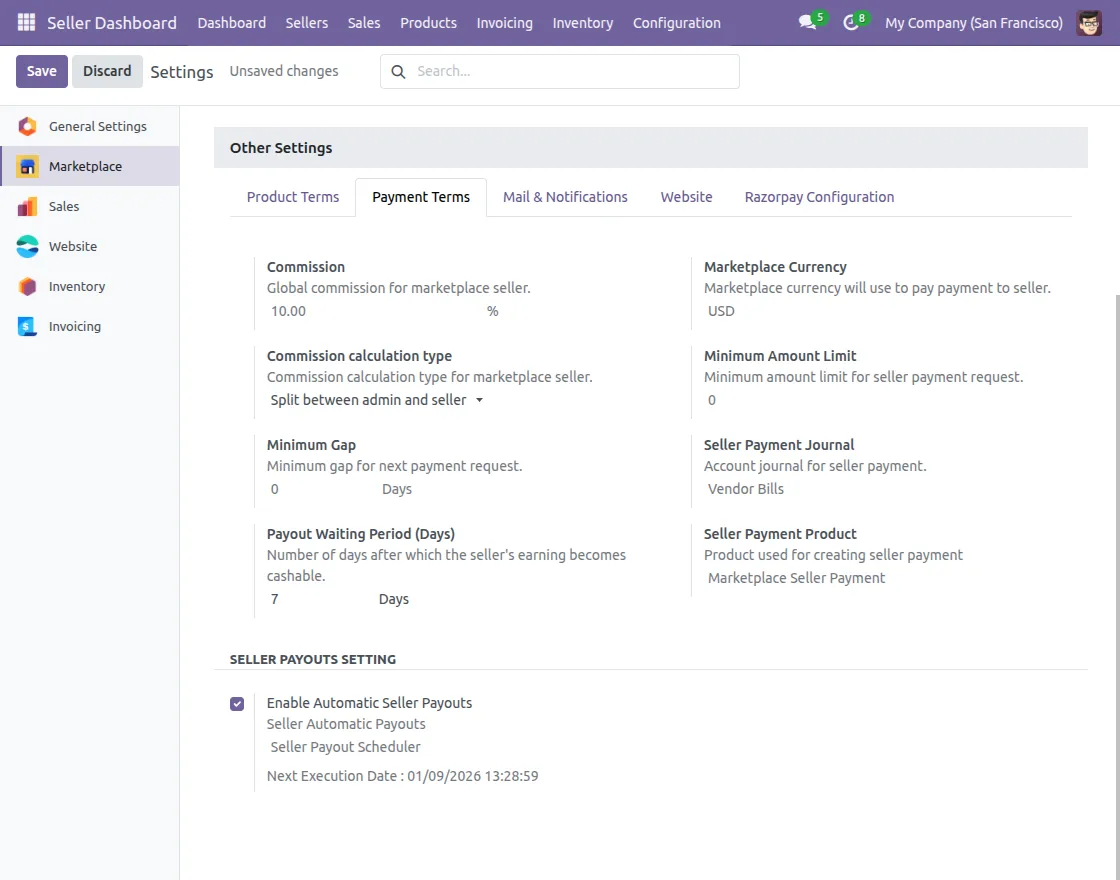
Go to Settings → Market → More Settings from the admin panel. Find options for Seller Payment Settings under the payment terms tab. Enable Automated Seller Payments if you want payments to be made automatically. Save settings to apply changes.
4. Create Seller Payment
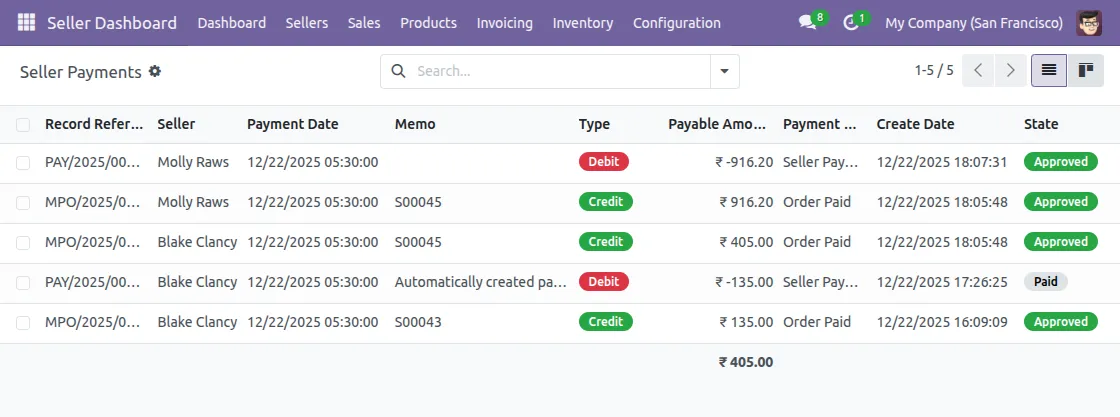
Once the order is complete, open it Seller Dashboard →Sales →Seller Payments. Seller payments are made based on completed orders.
If Automated Seller Payments enabled, seller payments are generated automatically. If disabled, admins can create seller payments manually.
- Seller payments are made only to sellers with verified bank accounts.
- You can also track seller payment status from seller payment records.
Seller Workflow
1. Add Bank Details
Navigate to Seller Dashboard → Seller → My Profilethen select razor payment as a payment type.
Next, open it Bank Details tab below Market Settings & Detailsenter complete and correct bank account information, and finally click Confirm knob.
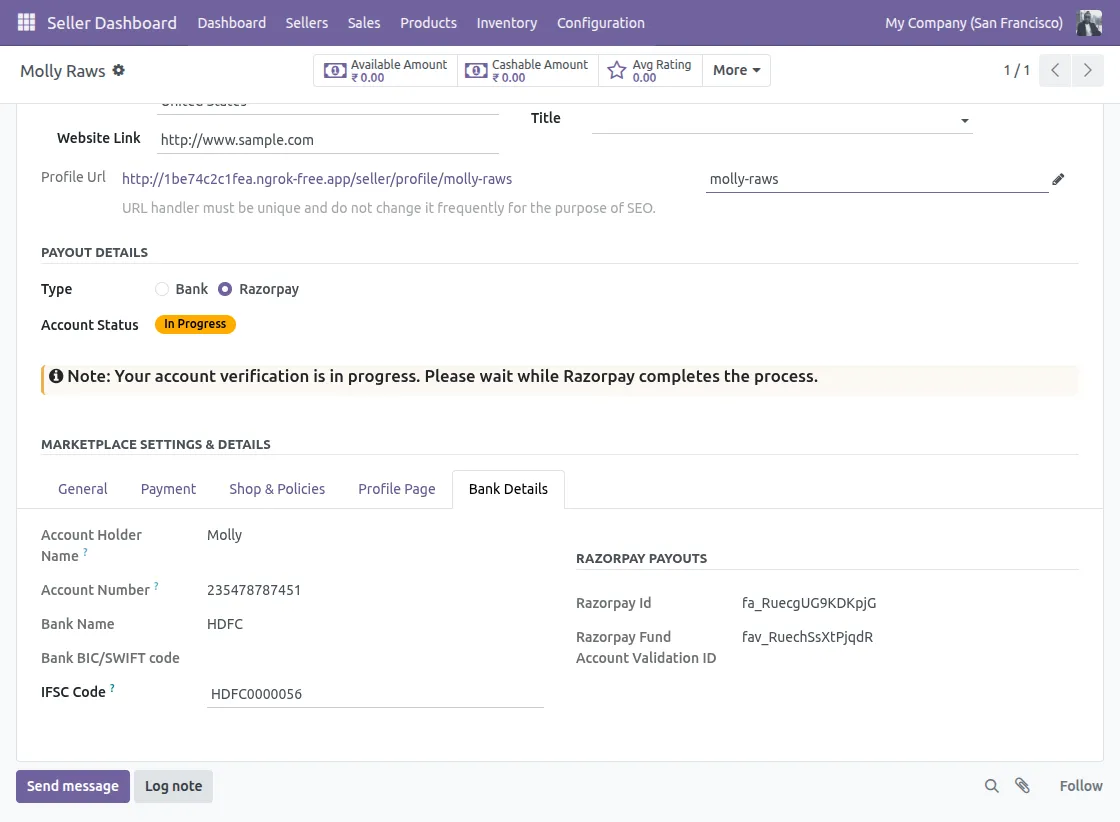
2. Bank Account Validation
Bank account verification is handled by Razorpay. After successful verification, the account is marked as verified. Only verified bank accounts can receive payments.
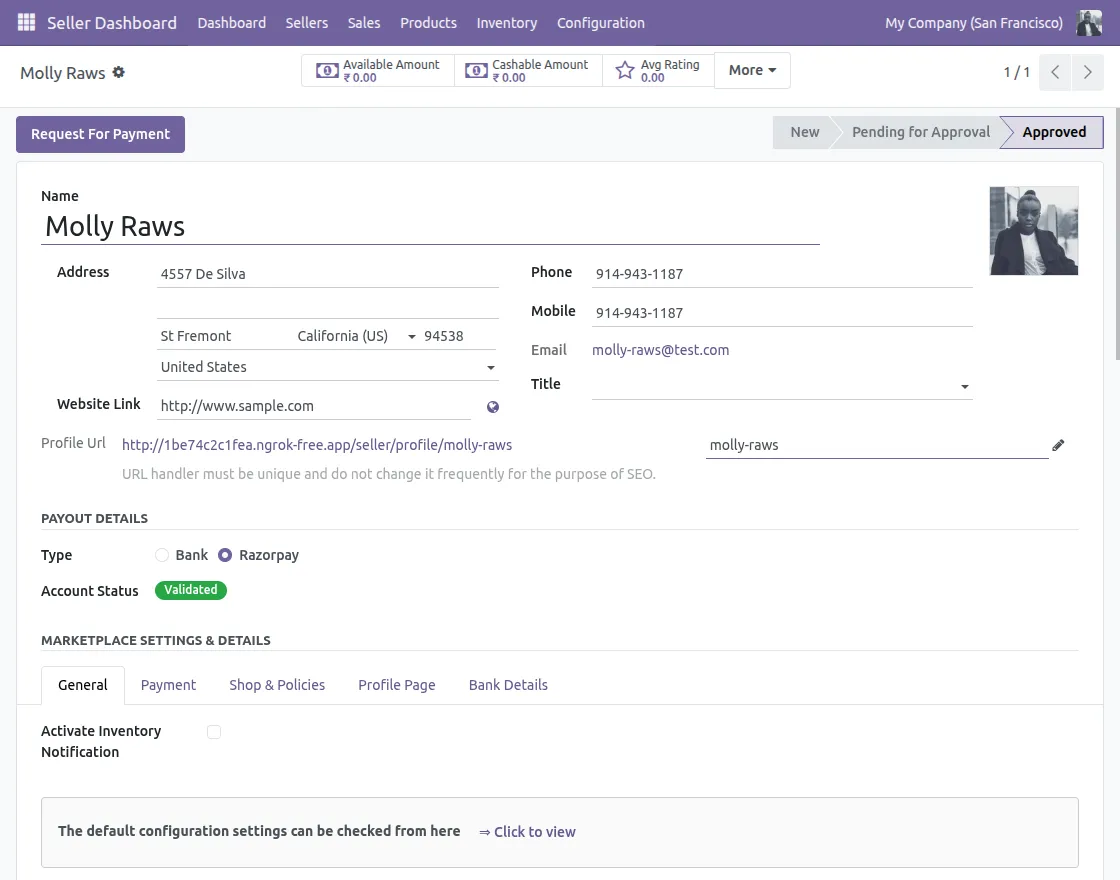
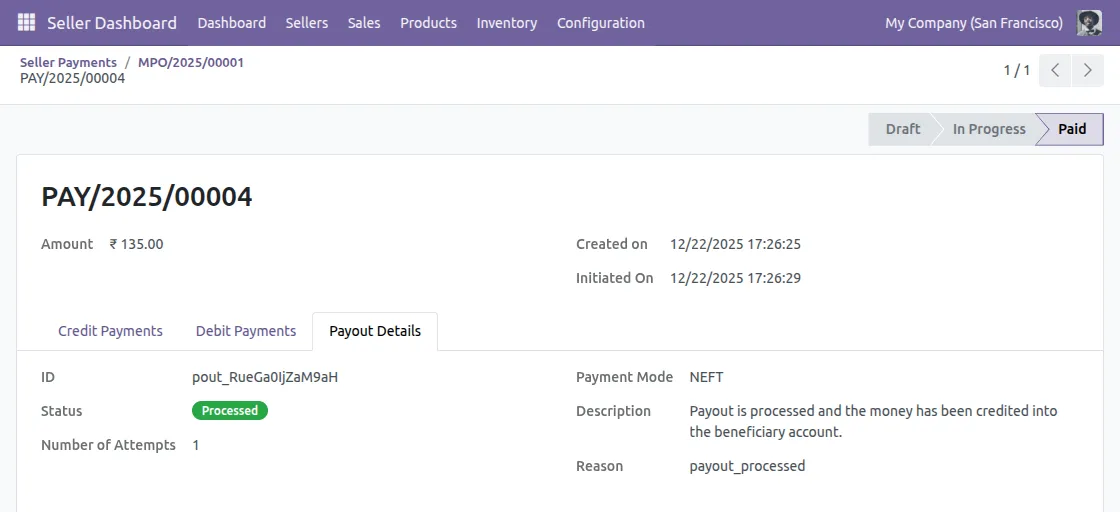
3. Receive and Track Payments
Once the payment is processed, the amount is transferred to the seller’s bank account. Sellers can see the payment status of their account. This completes the seller’s checkout process.
Customer Workflow
1. Add Products to Cart
First, the customer adds products to the cart and goes to the cart page to review the order details.
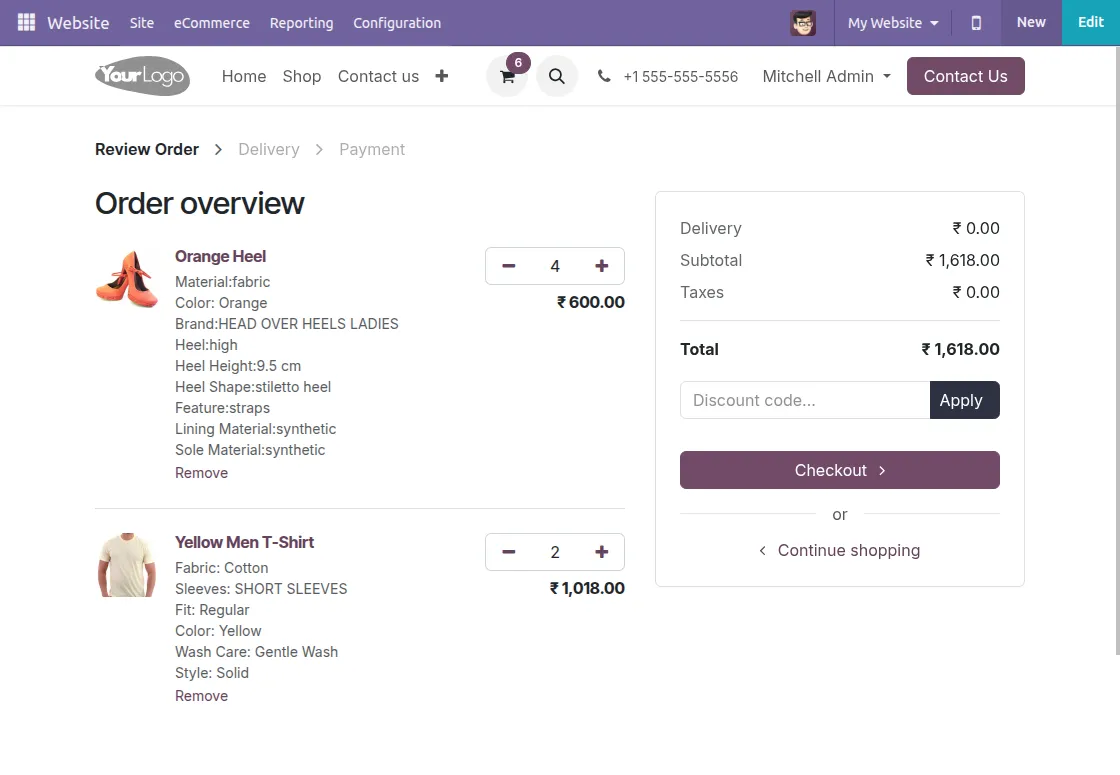
2. Order Confirmation
Next, the customer proceeds to checkout, enters shipping and billing details, and confirms the order.
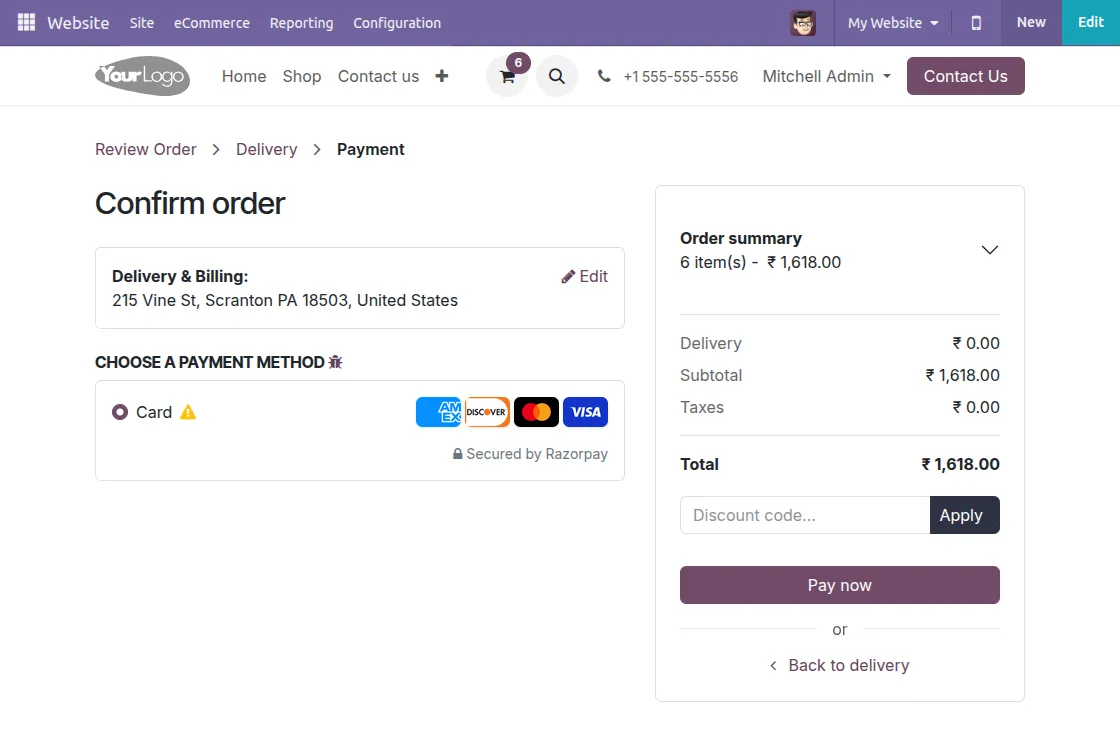
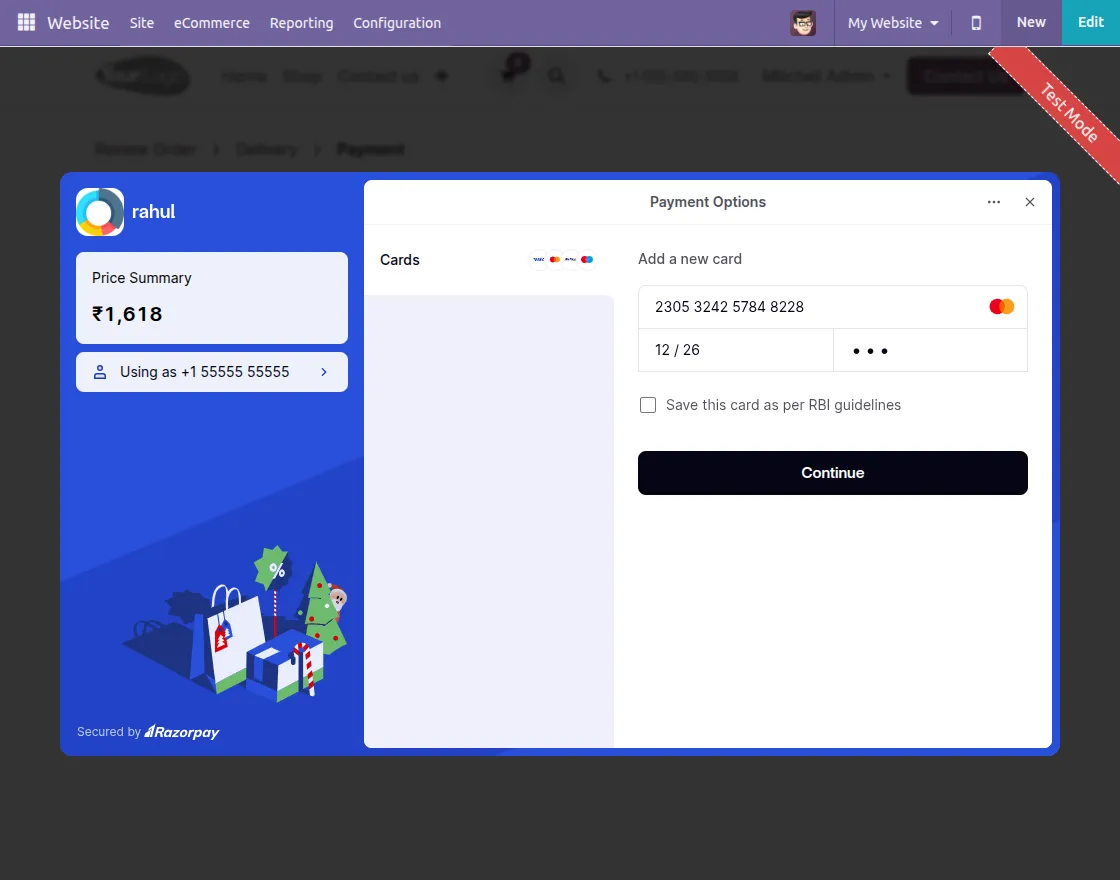
3. Enter Payment Details
After that, the customer chooses razor payment as a payment method and enter card or payment details securely.
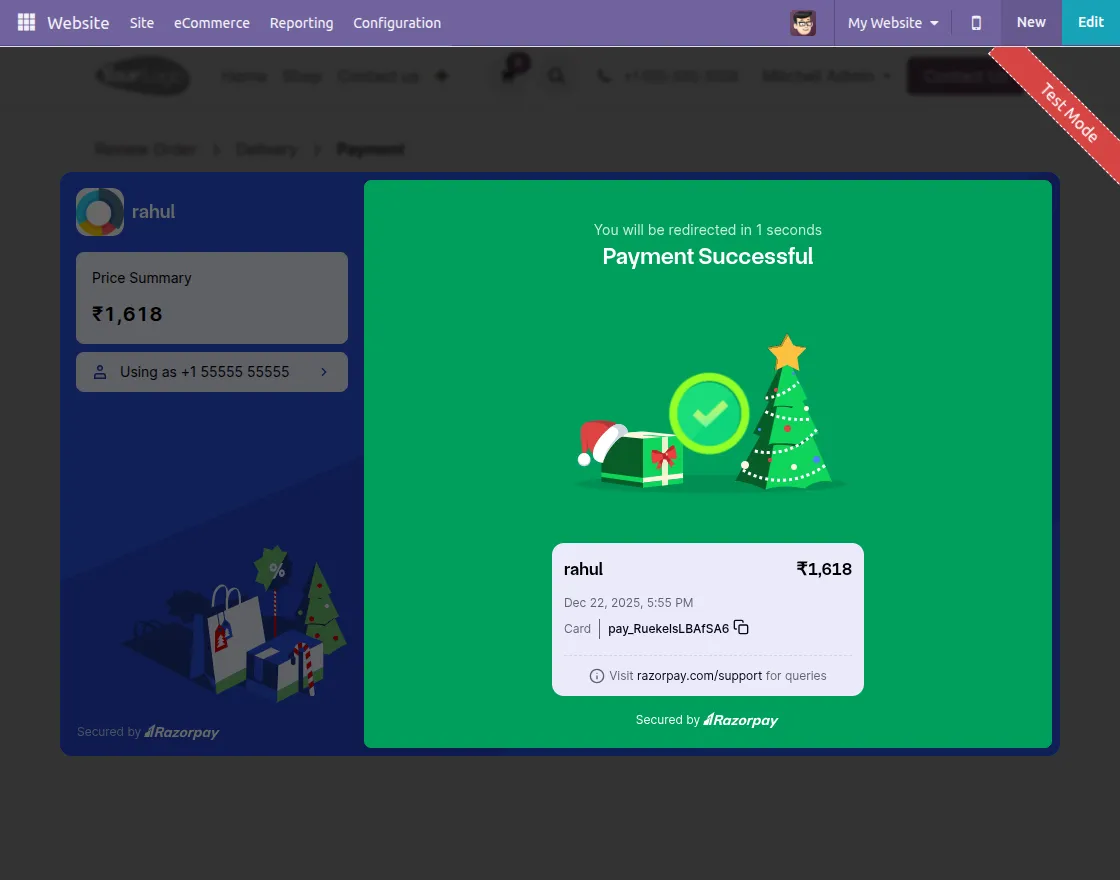
4. Complete Payment
Finally the payment was successfully completed via Razorpay and the order was confirmed.
We hope this guide is useful for you! Please share your feedback in the comments below.
If you still have problems/questions, please create a ticket at UV Desk.
I hope this helps. If you have further questions, contact us on our support mail.
Thank you for noticing!!
Current Product Version – 1.0.0
Supported Framework Version – Odoo 18

News
Berita Teknologi
Berita Olahraga
Sports news
sports
Motivation
football prediction
technology
Berita Technologi
Berita Terkini
Tempat Wisata
News Flash
Football
Gaming
Game News
Gamers
Jasa Artikel
Jasa Backlink
Agen234
Agen234
Agen234
Resep
Download Film
Gaming center adalah sebuah tempat atau fasilitas yang menyediakan berbagai perangkat dan layanan untuk bermain video game, baik di PC, konsol, maupun mesin arcade. Gaming center ini bisa dikunjungi oleh siapa saja yang ingin bermain game secara individu atau bersama teman-teman. Beberapa gaming center juga sering digunakan sebagai lokasi turnamen game atau esports.