Odoo BigQuery Connector enables seamless integration with BigQuery, allowing you to export datasets, define table structures and links, and keep your business data up to date.
For example, a retail company can use the connector to send daily sales, inventory, and customer data from Odoo to BigQuery.
This allows analytics teams to create dashboards, track trends, and make business decisions faster.
It supports full and incremental synchronization, scheduled exports via cron, and simple management of linked tables, ensuring smooth and reliable data transfer from Odoo to BigQuery
Prerequisites for using Odoo BigQuery Connector
- Google-auth → Manage secure authentication so connectors can access BigQuery with the right credentials.
- Google API-python-client → Provides a communication layer for interacting with Google APIs, including BigQuery
- Google Cloud BigQuery → Acts as the primary client to run queries, manage datasets, and perform operations in BigQuery directly.
- Connect Odoo to BigQuery securely using a service account file
- Automatically discover BigQuery projects from service accounts
- Send Odoo datasets directly to BigQuery
- Send an Odoo table with the specified table structure to BigQuery
- Update the BigQuery table structure if there are changes in Odoo
- Create links between multiple tables using relational fields
- Set up automatic data sending using scheduled cron jobs
- Select only the recordings you want to sync
- Limit the number of records synced at once for better performance
- Only sync new or updated data based on the last sync time
- Option to completely delete Odoo data in BigQuery before resyncing it
- Once you purchase the App from Webkul store, you will receive a link to download zip module submit.
- Extract the files on your system once the download is complete. As a result, you will be able to see a folder named- ‘wk_bigquery_connector‘
- Copy and paste this folder inside your folder Odoo Add-ons Path.
- Now, open the Odoo Application and click on the Settings menu. Here, click Enable Developer Mode.
- Then, open the Application menu and click ‘Update Module List.’
- In the search bar, clear all filters and search for ‘wk_bigquery_connector‘
- You will be able to see the module in the search results. Click on ‘Install‘ to install it.
Connect Odoo to BigQuery
- After installation, log in to your Odoo account, navigate to the Odoo BigQuery Connector module.
2. Go to the Configure option in the Odoo BigQuery Connector module, and click the Connection button to start the setup process.

3. Go to the New option, then fill in the Service Account Name and Path fields

After filling in the Service File Name and Path, click the Test Connection button. A pop-up will appear with a successful connection message
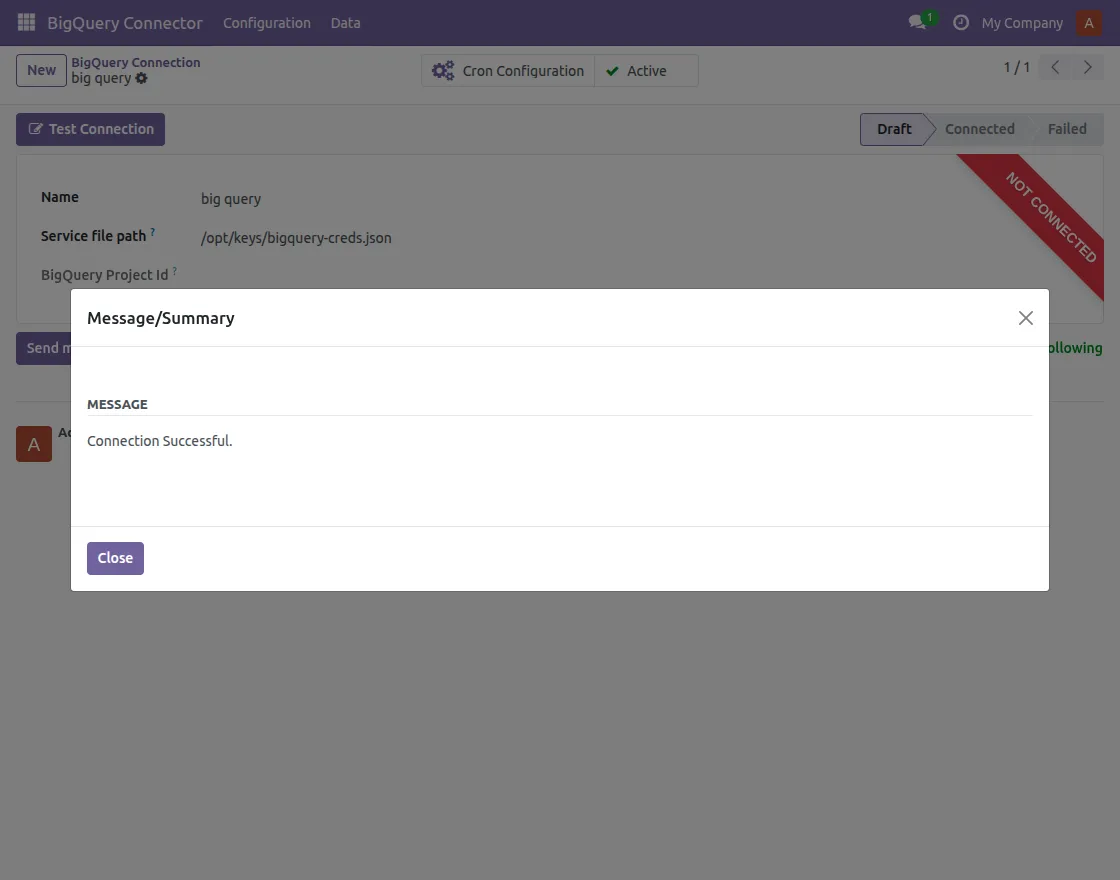
Happy! Connection successful. After a successful connection, the module will automatically detect your BigQuery Project ID.
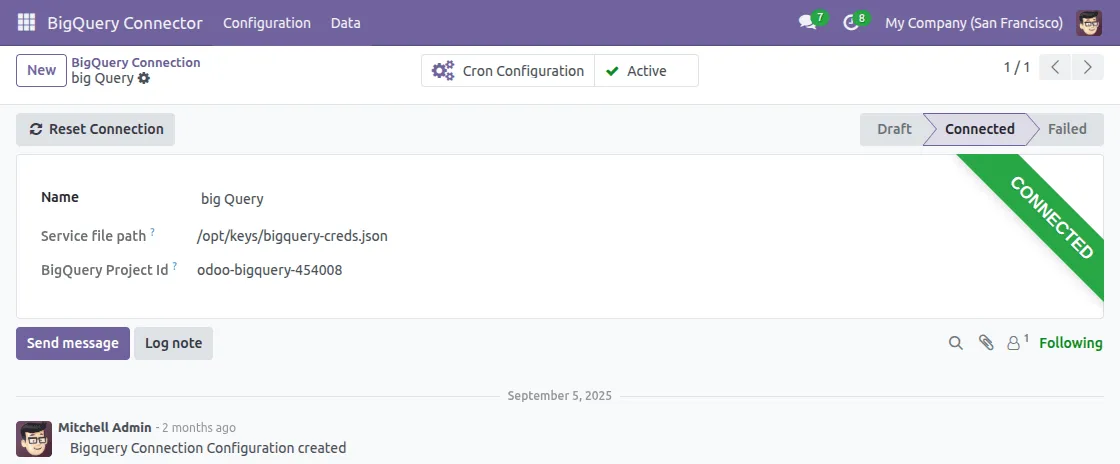
Basic Configuration
BigQuery Configuration: Basic BigQuery configuration includes the following steps:
- Service file path: Service account JSON file to connect to a specific project.
- BigQuery Project ID: The Google Cloud project ID associated with this connection.
Export Datasets and Tables from Odoo to BigQuery
- At the connector, open it Dataset. Click Create a Dataset and give a Name.
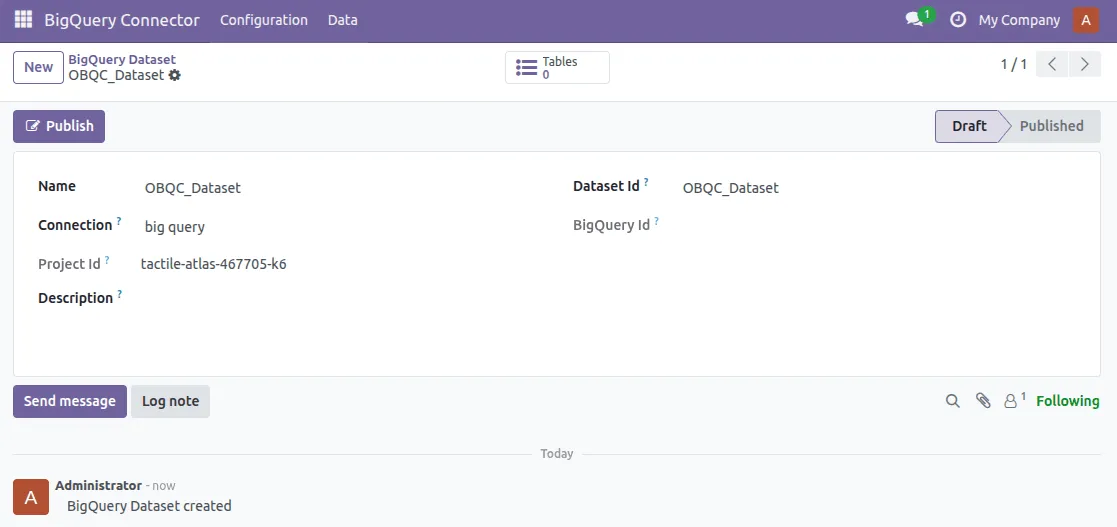
BigQuery Dataset:
Connection: Select the BigQuery connection to use for this dataset.
BigQuery Project ID: The ID of the Google Cloud project associated with this dataset.
Dataset ID: The actual dataset ID in BigQuery.
BigQuery ID: Unique identifier of a dataset in BigQuery
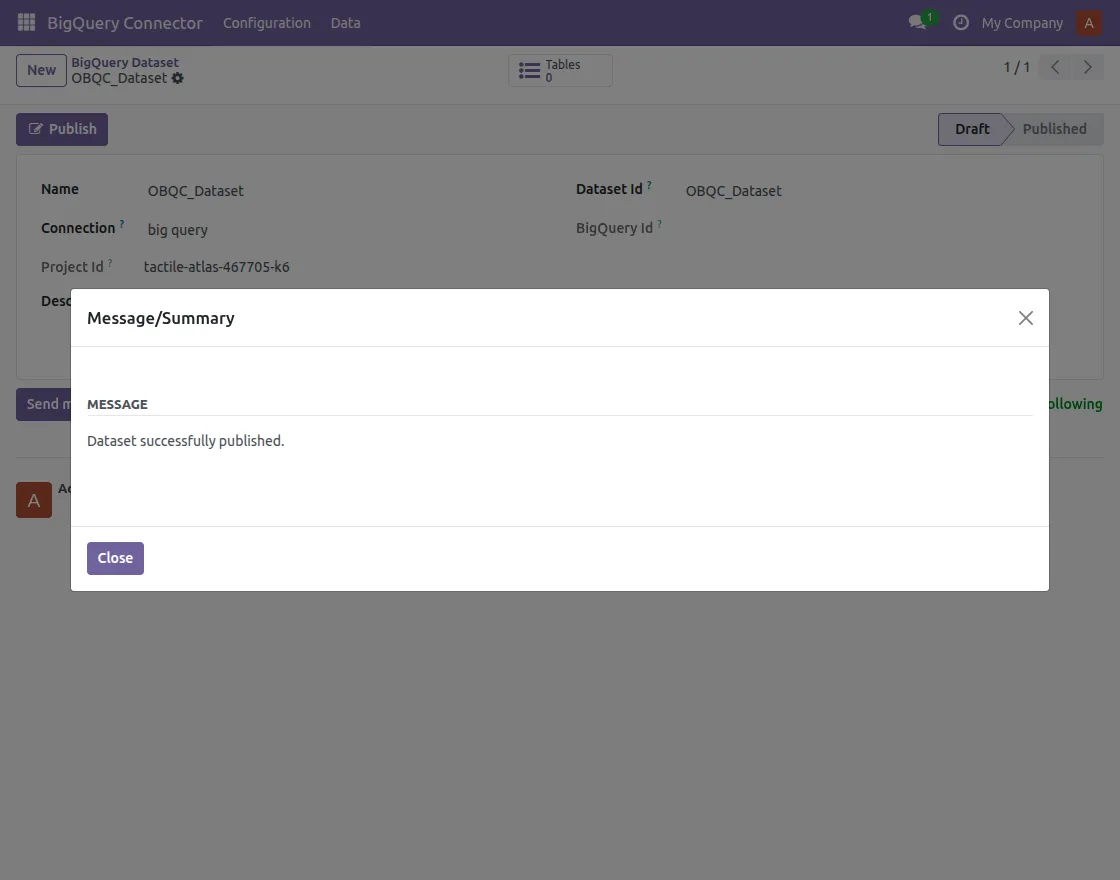
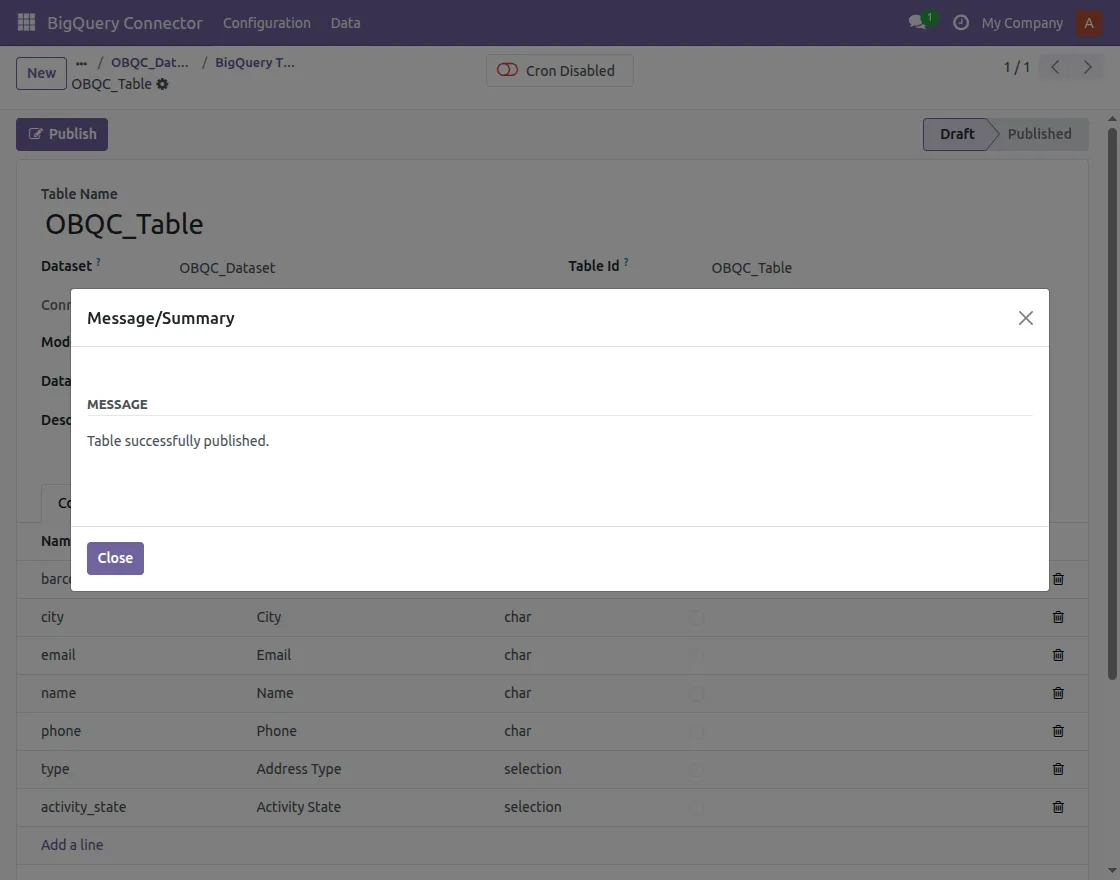
2. Select BigQuery Project where you want to export. Once the dataset is created, publish the dataset to BigQuery.
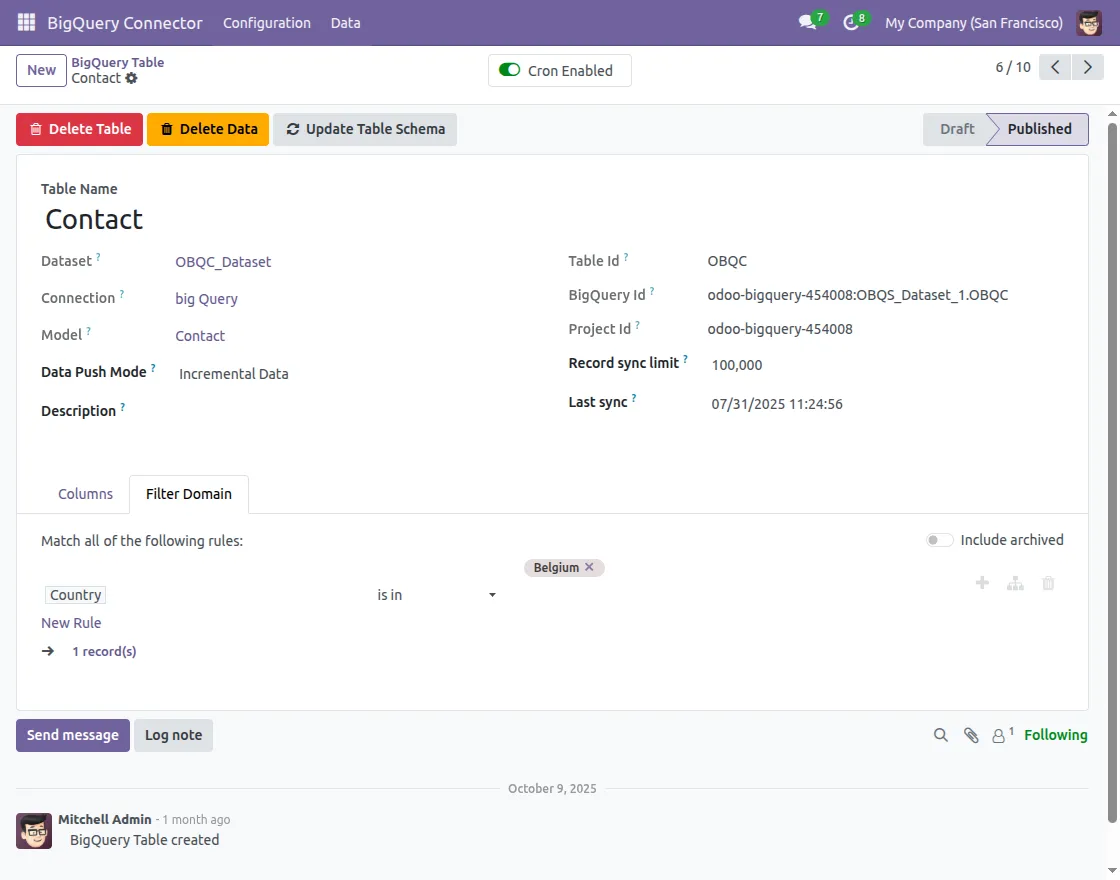
3. Go to Table, click Create Table, and select Odoo Models You want to export.
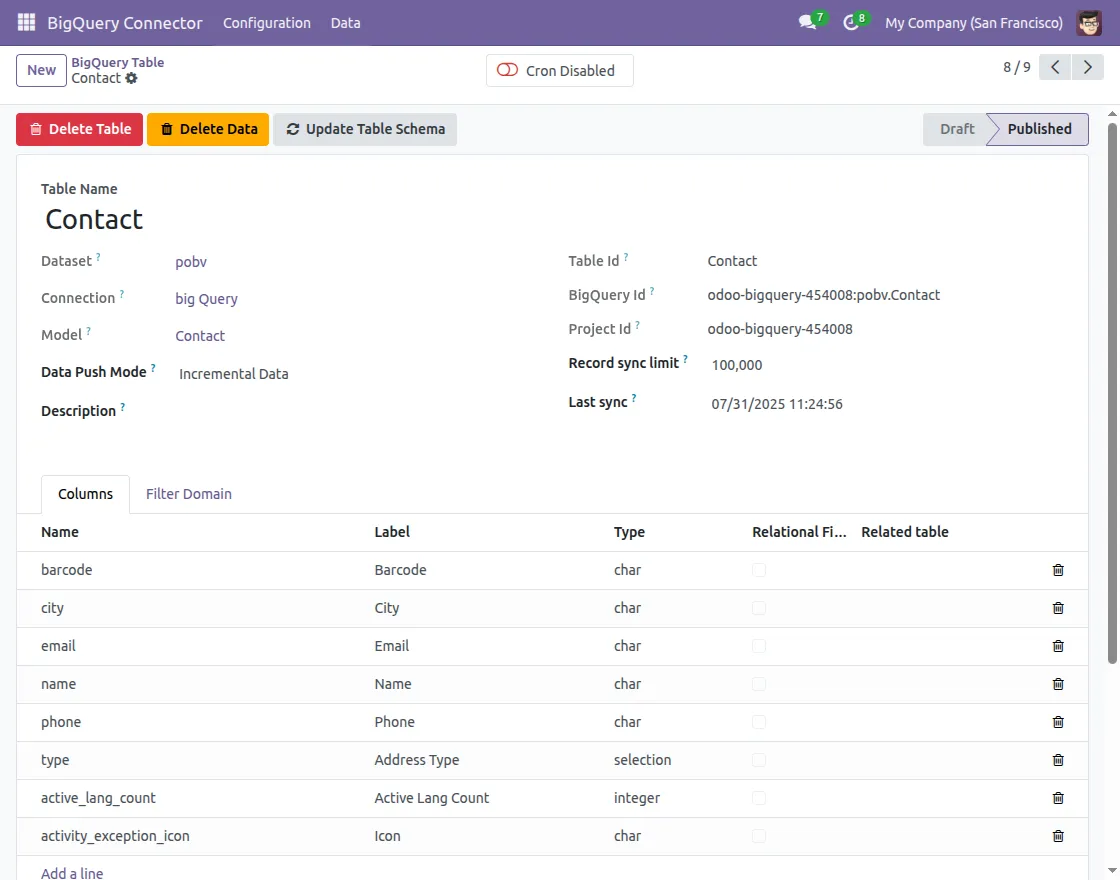
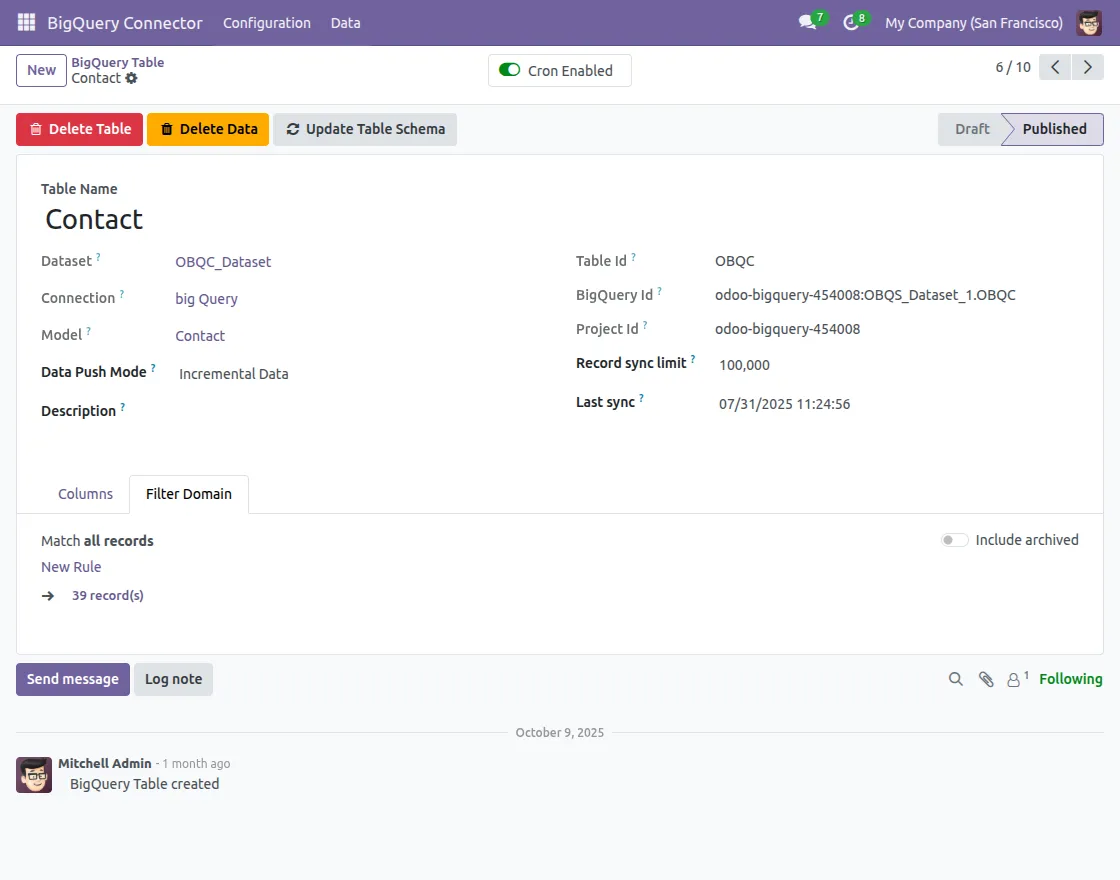
BigQuery Tables
Dataset: The BigQuery data set that contains this table.
Connection: The BigQuery connection used by the associated dataset.
Model: Select the module to fill in the data in this table.
Data Push Mode: There are 2 modes
- All: Delete all records and re-export all data.
- Incremental: Export only recordings created after the last sync date.
Table ID: The actual table ID used in BigQuery.
BigQuery ID: Unique identifier of a table in BigQuery.
Project ID: The Google Cloud project ID associated with this connection.
Record Sync Limit: No records will be synced to BiqQuery in a single API call.
Last Sync: For Additional Data Sync, records created after this data and time will be synchronized. Reset to blank to sync all available notes.
4. Determine table schema (column, data type) directly from Odoo columns.
5. Click publish to send the table to BigQuery.
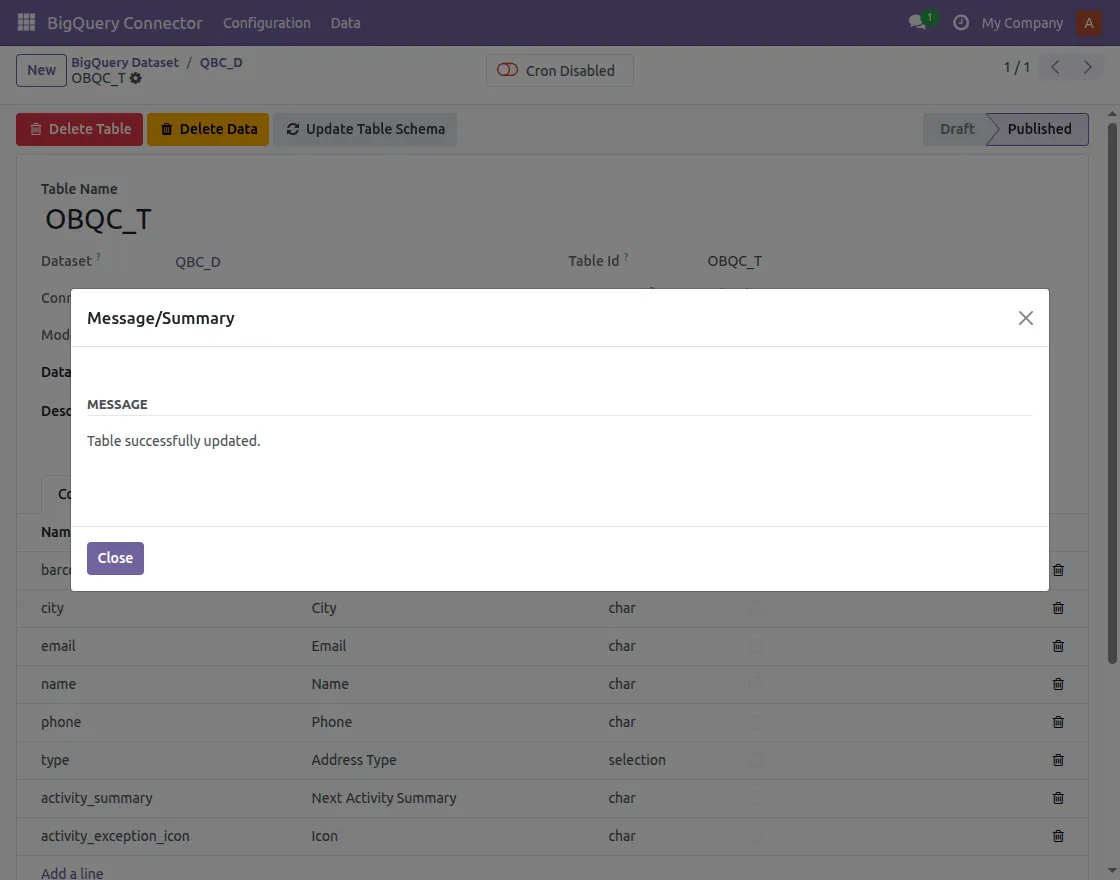
6. You can update the table schema from Odoo to BigQuery
Push, delete data and tables from Odoo to BigQuery
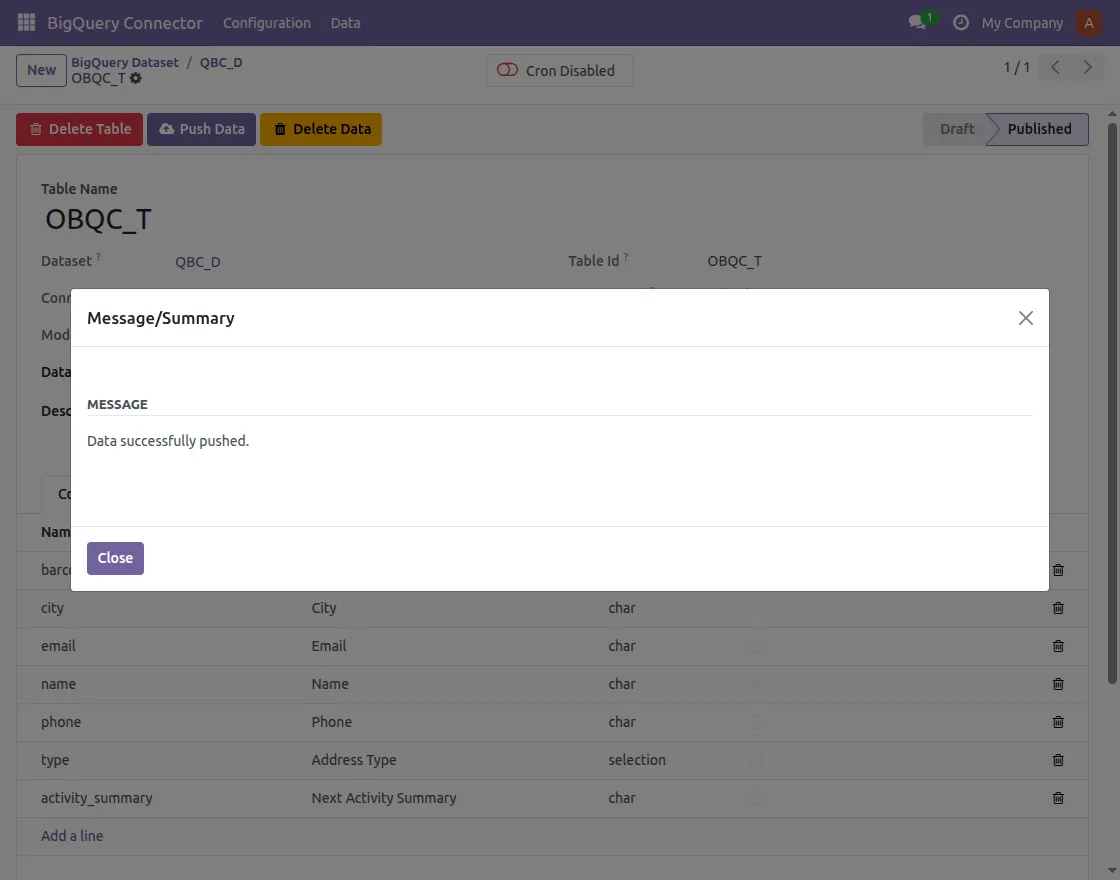
- You have successfully sent data from Odoo to BiqQuery.
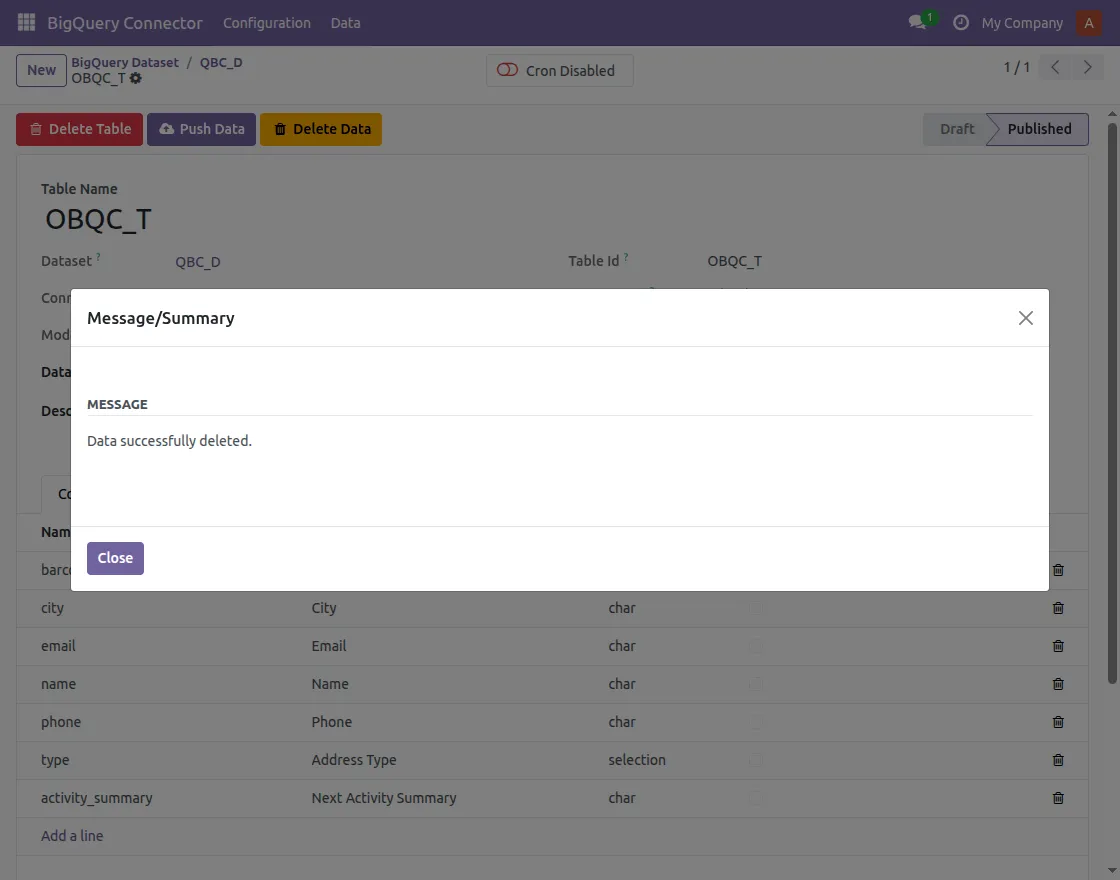
2. You have successfully deleted data from Odoo to BigQuery
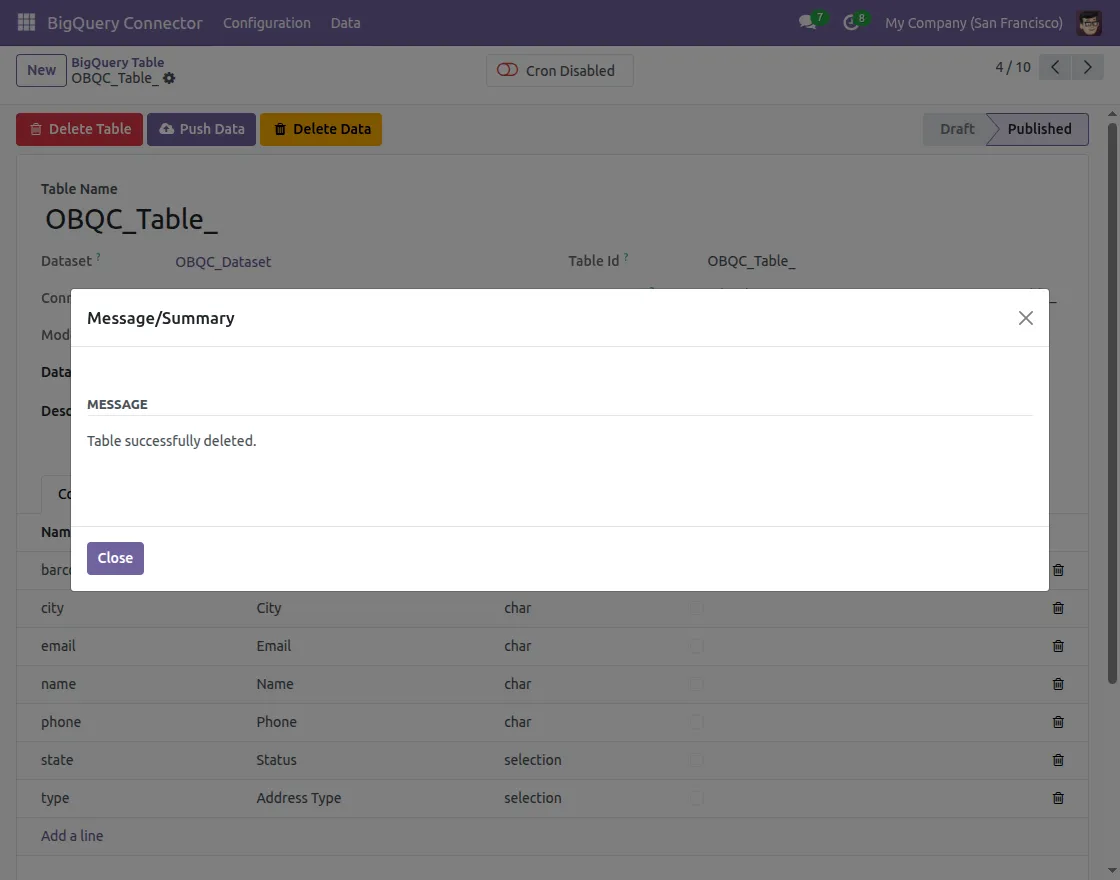
3. You have successfully deleted the table from Odoo to BigQuery
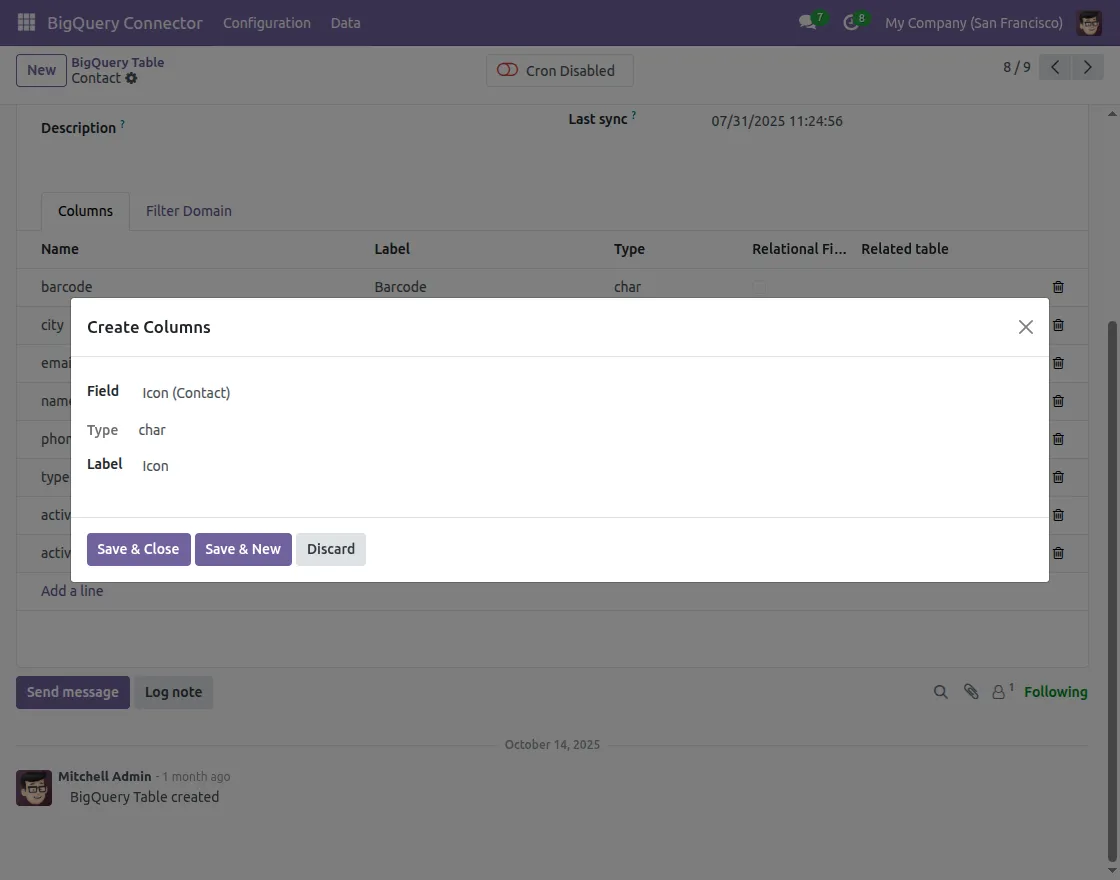
Filter Data When Exporting from Odoo to BigQuery
- When creating or exporting a table, open it Note Filter part.
2. Define condition to select only the necessary data (for example, only confirmed sales orders or customers from a specific region).

3. You can also set a record limit to avoid exporting too many records at once for performance reasons.

4. For additional export, select “Additional Mode” in Data Export Mode, which will only send records created after the Last Sync date.

5. Save filter and data push mode; only filtered data will go into BigQuery.
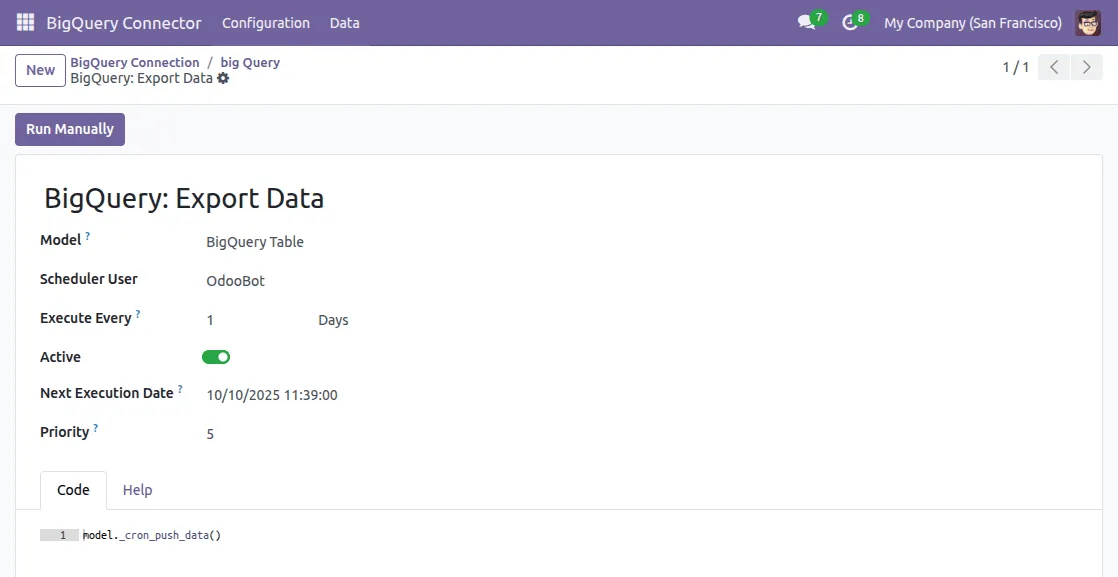
Cron configuration from Odoo to BigQuery
- Go to Configuration → Connectionthen select the data set you have created.

2. Then navigate to the Cron Configuration option. Then fill in the Execute Every column for repeated exports
We hope this guide is useful for you! Please share your feedback in the comments below.
If you still have problems/questions, please create a ticket at UV Desk.
I hope this helps. If you have further questions, contact us on our support mail.
Thank you for noticing!!
Current Product Version – 8.0.0
Supported Framework Versions – Odoo V19, V18, V17

News
Berita
News Flash
Blog
Technology
Sports
Sport
Football
Tips
Finance
Berita Terkini
Berita Terbaru
Berita Kekinian
News
Berita Terkini
Olahraga
Pasang Internet Myrepublic
Jasa Import China
Jasa Import Door to Door